DUE TO SPAM, SIGN-UP IS DISABLED. Goto Selfserve wiki signup and request an account.
...
Select Loan Product from the quick access menu. This will launch the Manage Loan Products Page.


Create Loan Product
Click Blue +Create New Product icon at the right-bottom of the manage loan product screen.


Complete the following Fields:
Provide Short Name
Provide Loan Product Name
Provide Description of the product
Select Currency from drop down menu
Provide minimum principal amount of the loan
Provide maximum principal amount of the product
Set Maximum Term of the product. Select either weeks, months or years.
Click CONTINUE


Provide Cash/Fund Accounts (Assets accounts only)
Provide Member Loan Ledger (Assets ledger only)
Click CONTINUE

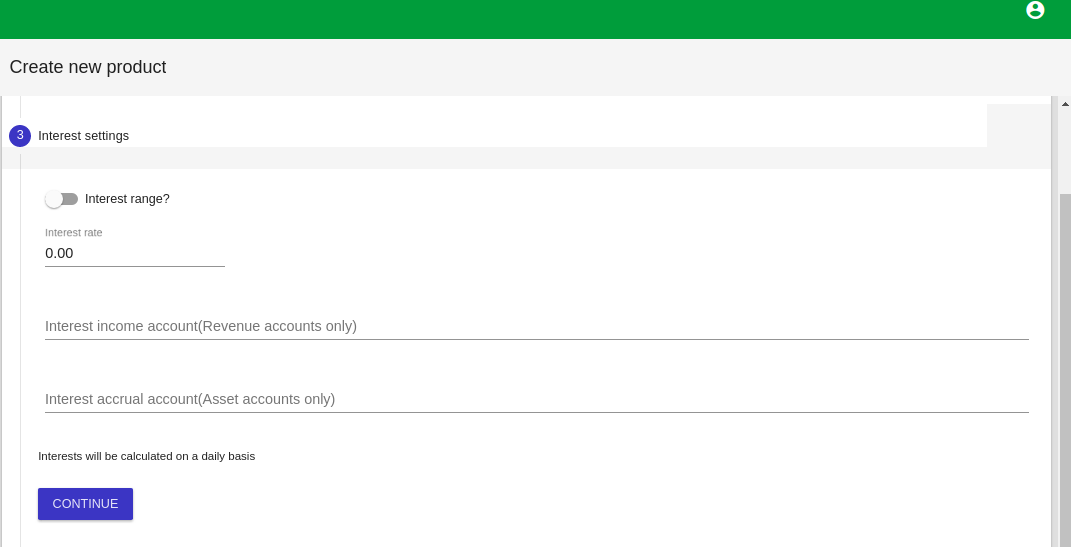
Set Interest Rates. Select Interest Range to set Minimum and Maximum interest rates (Mandatory)
Provide Interest Income Account (Revenue Accounts only)
Provide Interest Accrual Account (Assets accounts only)
Click CONTINUE


Provide Processing fee income account (Revenue accounts only)
Provide Loan Origination fee income account (Revenue accounts only)
Provide Disbursement fee income account (Revenue accounts only)
Provide Late fee income account (Revenue accounts only)
Provide Late fee Accrual account (Asset accounts only)
Click CONTINUE

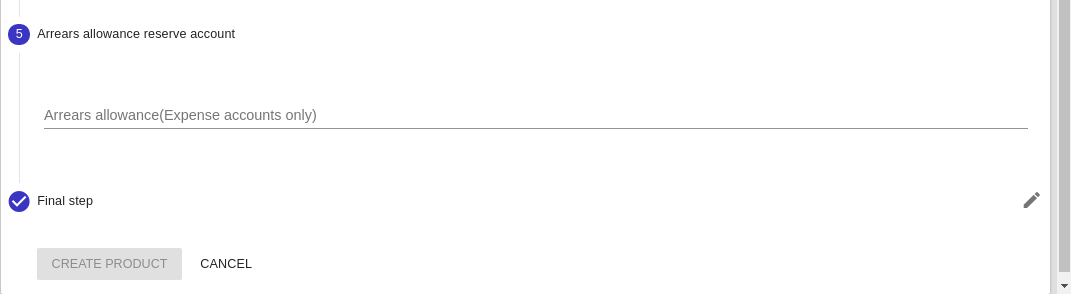
Provide Arrears Allowance (Expense accounts only)
Click CREATE PRODUCT
...
Return to Manage Loan Product page. A chart of all loan products created will be displayed.


Click on blue SHOW button against the loan product. In the example we use loan Business Loan

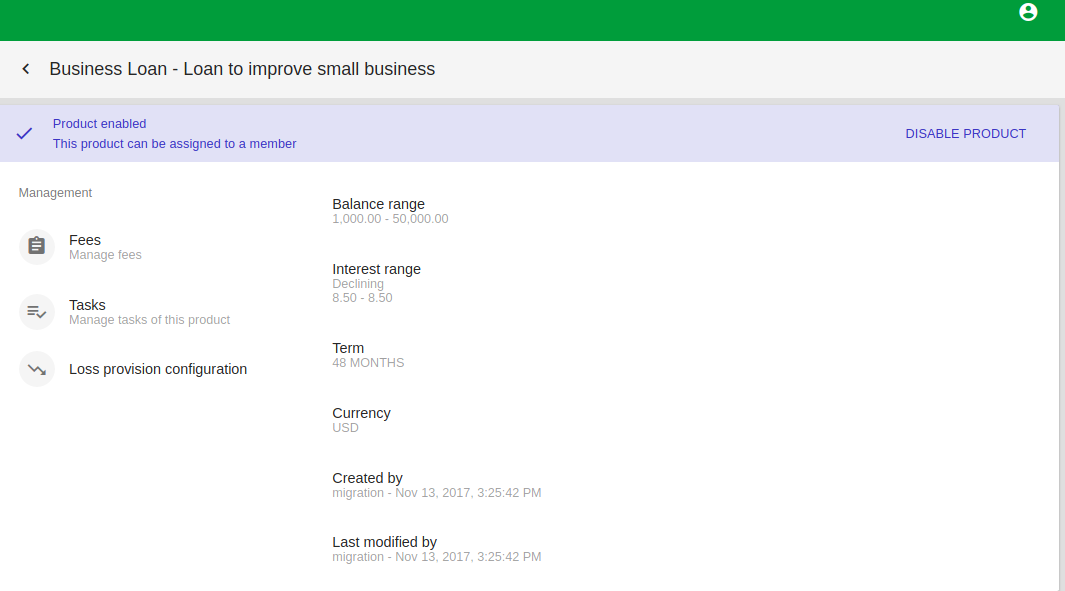
Click on disable product to change product status
...
Click on Fee on the loan page to manage fees

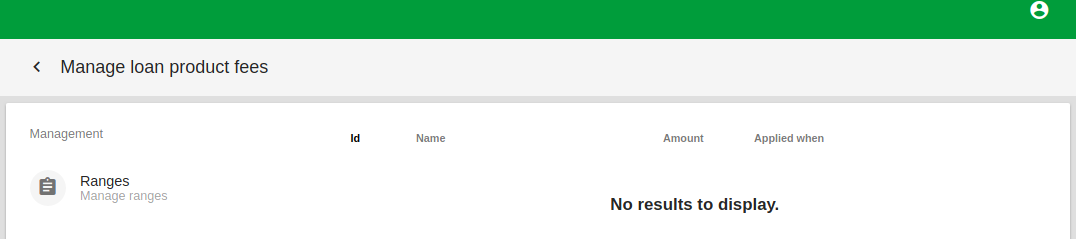
Click on Ranges To view product Ranges
Click on blue +create new range icon at the right-bottom of the manage ranges page


Enter Identifier
Enter Range start
Enter Range End
Click ADD RANGE if you want to add another range
Click on CREATE RANGE
...
Click on Tasks on the loan page to manage tasks definitions. Click on blue +create new tasks icon at the bottom of the manage tasks definitions page.

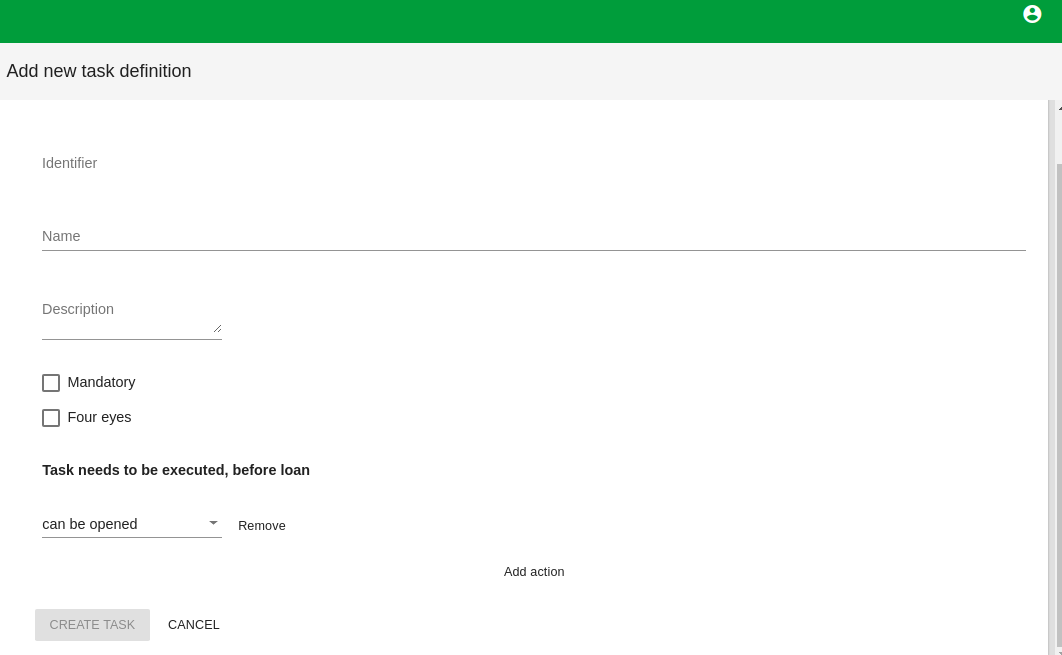
Enter Identifier
Enter Name
Enter Task Description
Select Mandatory if task is mandatory
Select Four Eyes
From Drop Down menu select when tasks needs to be executed
Click on CREATE TASK
Click on Loss Provision Configuration to edit configuration. Click on Blue Edit Configuration icon at the right bottom of the loss provision configuration page.


Click ADD STEP
Enter Days late
Enter Percent provision
Click UPDATE LOSS PROVISION
...