THIS IS A TEST INSTANCE. ALL YOUR CHANGES WILL BE LOST!!!!
Page History
...
Image V - Experiment Summary
Tutorial III - Configure Individual Account on Clusters
Credentials
wrewrwe
Add Accounts
Tutorial IV - Create & Launch Experiment
Create Experiment
- Navigation to experiment creation page Main Menu --> Experiment --> Create Experiment
- Create Experiment Page - Experiment Information

Image VI - Create Experiment - First enter/select given fields;
- Experiment Name (Mandatory)
- Experiment Description (Optional)
- Project (Select from the available LOV. Latest will be on top; auto selected)
- Application (Select from the available LOV)
- Then continue entering Application configuration information.
- Experiment application input (Mandatory) - Application input can be in the form of entering data or uploading required input files.
NOTE: Uploading file validity is not checked by the gateway. User has the responsibility of uploading correct files. - Compute Resource (select from the available LOV. If the application is existing in a single resource, it will be the default value)
- Queue (a default value will be taken if not changed by the user)
- Node Count (If not entered default value will be taken as the input)
- Total Core Count (If not entered default value will be taken as the input)
- Wall Time Limit (If not entered default value will be taken as the input)
- Total Physical Memory (If not entered default value 0 will be taken as the input)
- Notifications: Add email address if required to receive job starting and completing notifications from compute resource itself.
NOTE: For some compute resources, above default values will not be correct. User needs to change the node count in such cases.
- Experiment application input (Mandatory) - Application input can be in the form of entering data or uploading required input files.
- Create Experiment - Application Configuration Part

Image VII - Create Experiment Contd.. - While entering application configurations user can start over from the beginning using ‘Start Over’ button.
- Once saved or saved and launched user will be directed to ‘Experiment Summary’ page; from summary page can monitor experiment status changes.
- Experiment Summary Page

Image VIII - Experiment Summary
...
- The experiment can be launched using 'Create Experiment' screen. Click 'Save & Launch' button to directly launch the experiment.
- If the experiment was just CREATED for a later launch, the user can launch from 'Experiment Summary' Page. For experiments that are 'launchable' 'Launch' button will be enabled in summary page.
NOTE: Experiments only in CREATED state can be launched.
Tutorial
...
V - Browse Experiments
- User can search for experiment created by him/her through
- Experiments → Browse
OR - Browse Projects → View Project → View Experiment (by clicking on the status of the experiment) - Please refer Search Projects in "Tutorial II" above.
- Experiments → Browse
In Browe Experiments search keys are;
Experiment Name
Experiment Description
Application
Creation Time - User can provide 'From Date' and 'To Date'

Image IX - Browse Experiments
All the experiments of the user will be listed; latest on top. The user can also search using provided keys with partial values, complete values, (*) wildcard. Above search can be narrowed by combining with experiment status as well.
By clicking on the 'Status' user will be navigated to ‘Experiment Summary’ screen of each experiment.
Experiment summary can be used to;
Launch experiment - Explained in above Tutorial III
Cancel experiment
Clone experiment
Edit experiment
View experiment data files (Inputs, outputs, archived files)
Tutorial
...
VI - Modify, Cancel, Clone &
...
Share Experiments
Modify Experiment
...
- Modify experiment by clicking on the edit icon (pencil) next to experiment name (In Browse Experiment, Project Summary) OR by clicking on ‘Edit’ button in Experiment Summary Page.
- User can modify all available fields except experiment status, project, application & experiment ID of experiments only in CREATED state.
...
- Experiments can be cloned irrespective of the experiment status by clicking ‘Clone’ in ‘Experiment Summary’ page.
- When clicks ‘Clone’ from experiment summary user will be navigated to ‘Edit Experiment’ page of the new experiment. The new experiment will have exact same information as the earlier existing experiment.
- The new experiment will have a new experiment ID and the status will always be CREATED.
New experiment name = Clone of + Old experiment name - User can change existing information (except the Application) in ‘Edit Experiment’ page and save or save & launch.
Share Experiment
Tutorial
...
VII - User Assistance
Report Issue
Gateway user can report issues faced within the gateway through this page.
Page navigation: Help → Report Issue
Raise a Bug Page
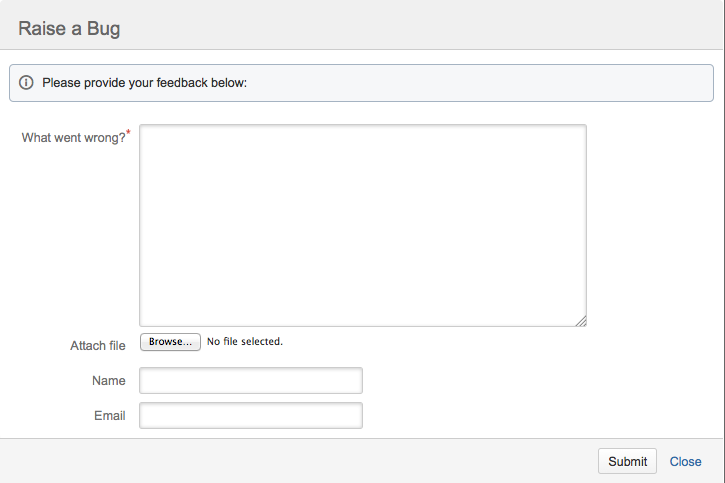
Image XII - Raise a Bug
Request Feature
Gateway allows users to provide feedback as well as request for new applications via Request Feature Page.
Page Navigation; Help → Request Feature
Got Feedback? Page
...
Overview
Content Tools
Apps