DUE TO SPAM, SIGN-UP IS DISABLED. Goto Selfserve wiki signup and request an account.

...
This document explains how to launch Felix inside of the NetBeans IDE. Then, which makes it will be possible to use NetBeans debugging and profiling facilities on bundles.
...
To integrate Felix inside of NetBeans , you need Felix and NetBeans and nothing else.
Installing NetBeans
First, you need NetBeans. To to download the NetBeans IDE go to http://download.netbeans.org/netbeans/6. 1/final/ . This tutorial was done using NetBeans 6.1, but it should work on NetBeans 6.0.
Creation of the Felix binaries
To integrate Felix inside of with NetBeans, you have two options:
- Integrating Integrate the Felix release as a Java project. This is what we are going to cover in this tutorial.
- Integrating Integrateg the Felix release using the Maven plugin. But this option has issues that can be resolved but it takes a little more work. This This option is slightly more complex and will be covered in another tutorial for those that really want to pursue it.
Using the Felix release as a Java Project
Once, NetBeans is installed, you need to download Felix. You will find Choose the Felix releases at http://felix.apache.org/site/downloads.cgi . Choose a binary binary Felix release in your preferred archive format. Then, unzip Extract the release in into a temporary directory. We will copy the files into our project later.
Building and
...
using the Felix
...
trunk
If you want to use the Felix trunk, follow the instructions located here http://felix.apache.org/site/building-felix.html on the Felix web site to checkout and build itthe trunk. The Felix binaries are created in the main project ( directory). We will copy these files into our project later.
...
This integration tutorial uses a Java project for the integration. This new project will contain Felix. In the following sections it will be explained how - to do this.
Creation of
...
a Felix Java project
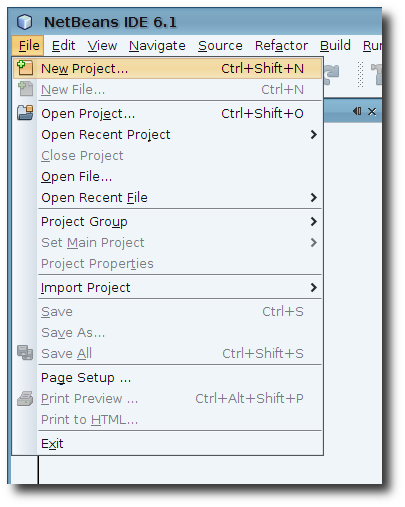
First launch NetBeans. Then click on File->New->Project... menu entry as shown in Figure 1.
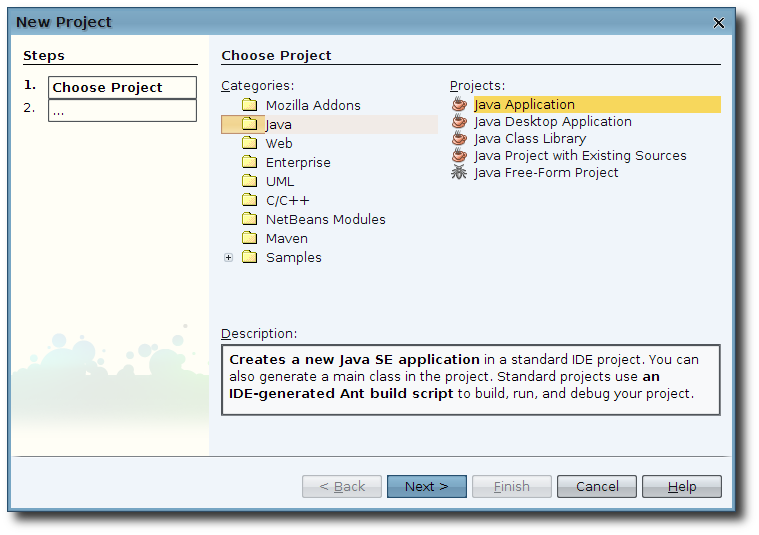
This action will launch the project creation wizard. From the Categories list choose Java and from the projects Projects list choose Java Application as shown in Figure 2, then press the "Next >" button.
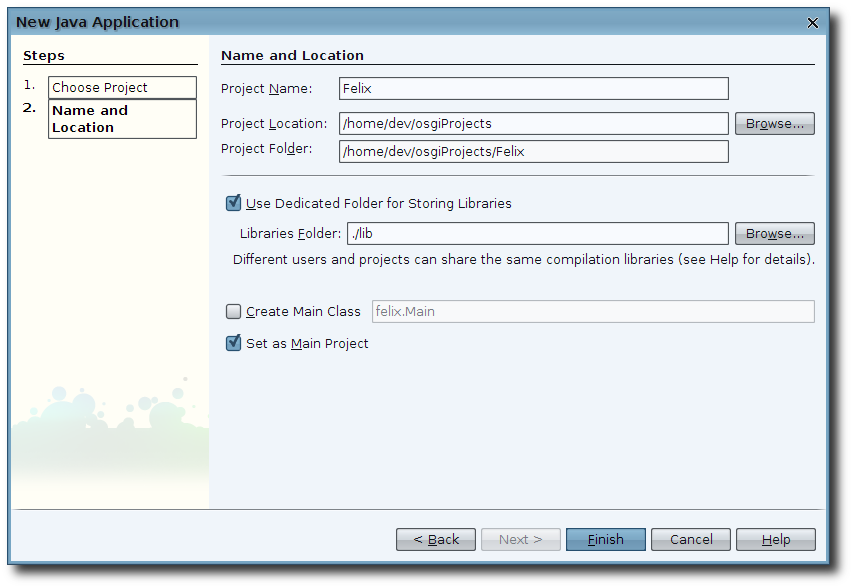
Enter the project name (Felix for example), select your project directory, and uncheck the "Create Main Class" check box then press the finished button. See Figure 3.
Copying Felix to the newly created project
Now, remember where you uncompressed the Felix release , or where the Felix main project is. Move or copy these files to your project directory. You can do this any way that is easiest for you. On my a Linux box I you do something like this from the location where I built Felixdirectory where Felix resides or was built:
| No Format |
|---|
cp -r ./* /project path/ |
Where /project path/ is the path to your project directory.
Once you have Moved moved or copied the files Collapse collapse and expand the project. This will make NetBeans refresh the project. If that does not work for you (on NetBeans 6.0 it may not) just close and open it.
Preparing the Felix
...
project
The first thing you will notice is that our new project has a red exclamation point on it. What this means is that when NetBeans parsed the java Java files it could not find all the library dependencies, so lets let's fix that up.
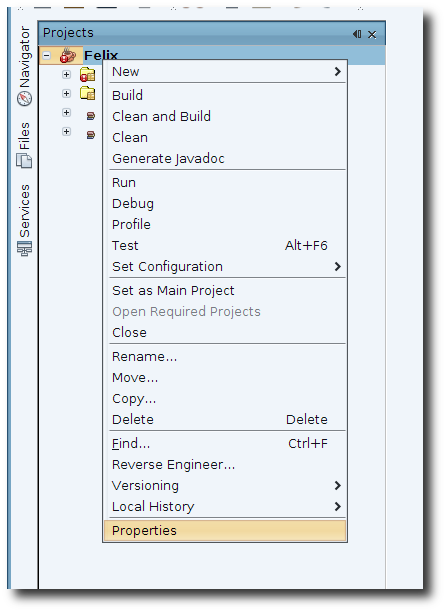
Right-click on the just newly created project and select the properties as shown in Figure 4.
This will bring up the project properties dialog. Select Libraries as shown in Figure 5.
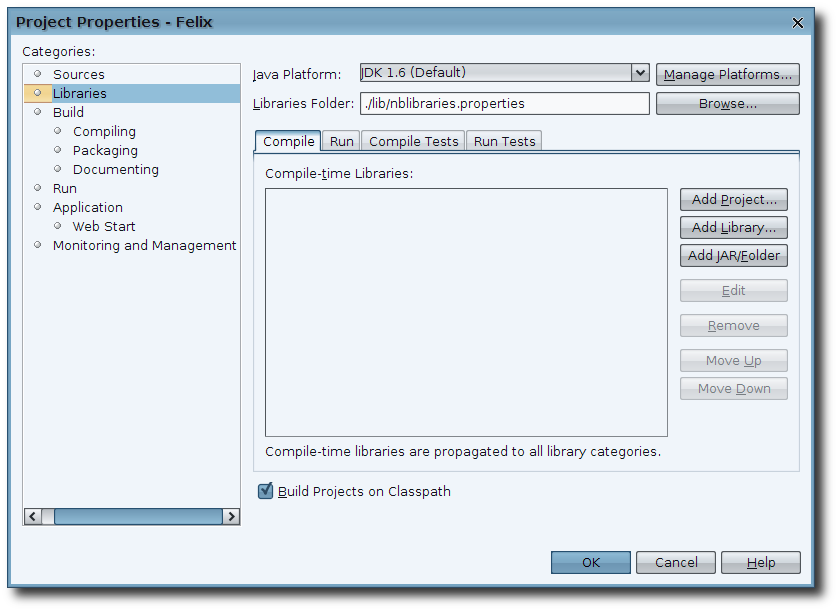
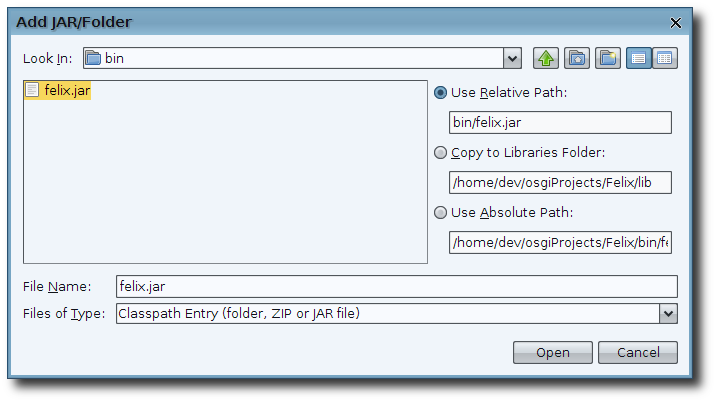
Now we want to press the "Add JAR/Folder" button and navigate to your project directory/bin and select the Felix felix.jar as shown in Figure 6. NOTE: Make sure the "Use Relative Path:" Radio radio button is selected. Then press the Open button.
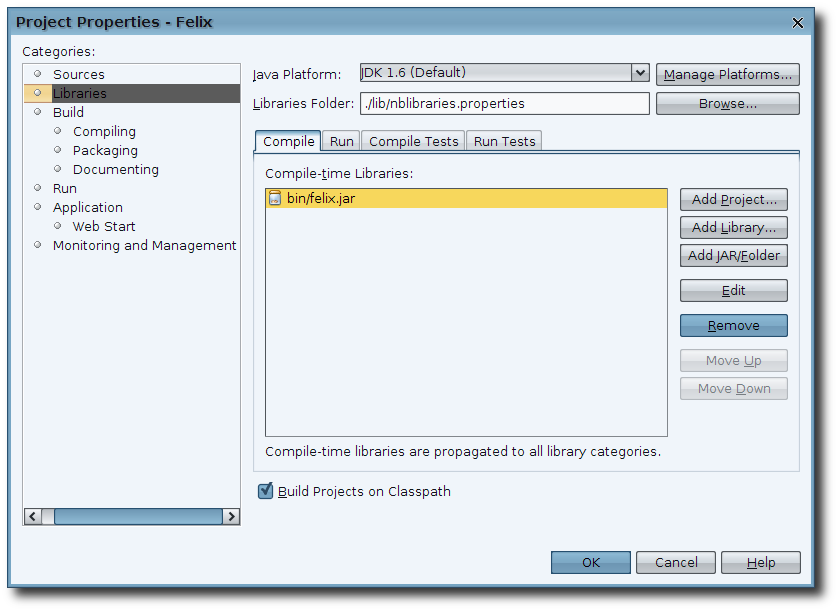
Your Libraries libraries panel should now look like what is shown in Figure 7. You can now press the OK button.
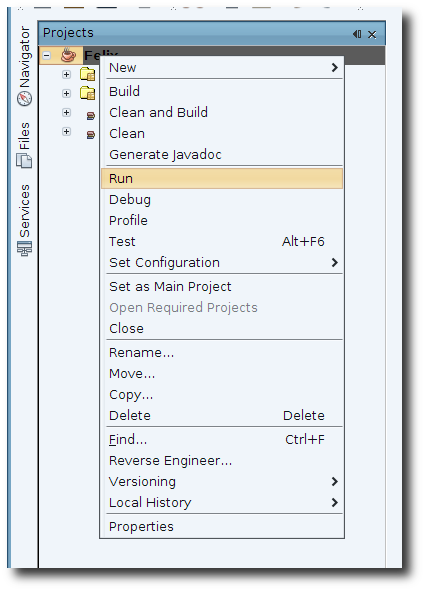
At this point the red exclamation point should should disappear and now we can run Felix. Right click on the project node and select the Run menu item as shown in Figure 8.
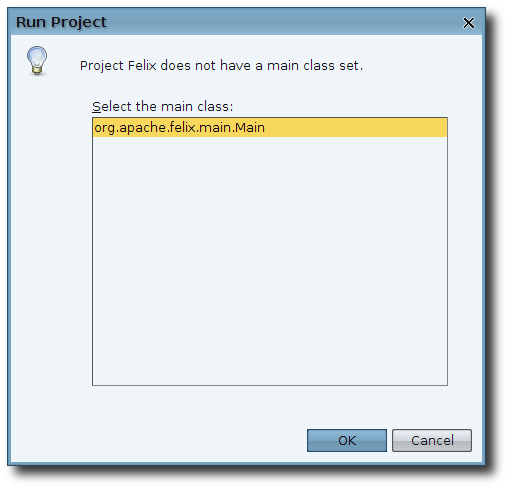
When you do this the Run Project dialog will pop-up with a list of all class files with a main method defined. In our case this will only show the org.apache.felix.main.Main class so we select that and press the ok OK button. The Run Project dialog is shown in Figure 9.
After you press the OK button in the Run Project dialog, Felix will be launched and the output window will open with the Felix command line tool running as shown in Figure 10.
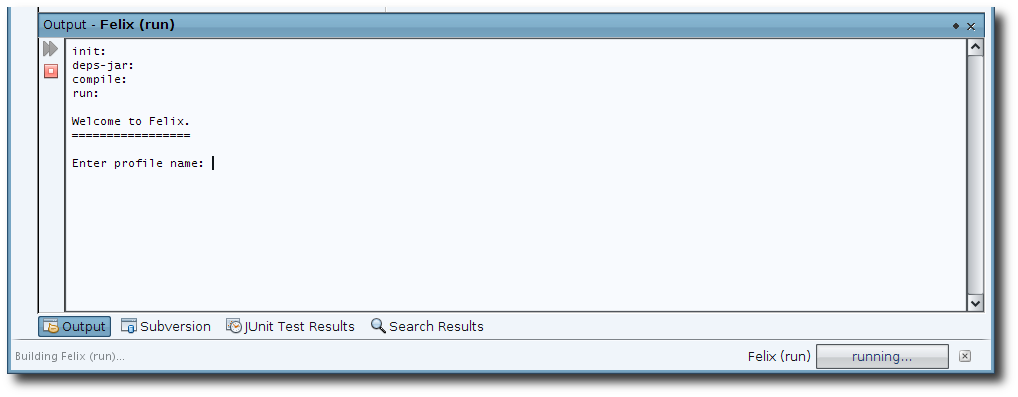
At this point you can enter your preferred profile and interact with Felix as if you had launched Felix from a command line shell.
...
Now that our project is all setup all set up, you only have to do to re-launch Felix is select the Run menu item from the project context menu to re-launch Felix. Or if you prefer, if you set Felix as the Main main project, then you can use the Run Menu menu on the main menubar.
Felix Configuration
At this point, you may want to make some changes to the way Felix is configured. In NetBeans you will have to open the Files View view. Expand the Felix folder and then the conf folder as shown in Figure 11. NOTE: When you see do this the first time the cache folder will not be there. If you decide to make the configuration changes shown in the next section then it will be created the next time you run Felix.
...
Felix stores profiles and deployed bundles inside a cache. Normally this cache is located at $userhome/.felix. It is possible to change this location in order to clean it quickly and also to keep your development cache separated from other felix Felix-based applications you may be running on your computer. You may also want to set a default profile so you don't have to enter it every time you launch Felix.
Open the configuration file (, called config.properties). Then, add a new line with felix.cache.dir=cache (see Figure 12). And if you want to set a default profile, uncomment the felix.cache.profile=foo line and change it to what you want (Figure 12). To clean your cache, just delete the cache directory.
...
The next time you run Felix, the cache directory will be created with in your project. To verify that it did or if you want to clean it use the File Files view and to expand the Felix folder; you should now see a cache folder that was not there before. You can refer to Figure 11 to see this as I had already ran Felix again before taking the screen shootwhich displays the cache directory from a previous execution of Felix.
Add auto-started bundles
Often you will want Felix to automatically deploy some bundles that you need for your development. You can do this by modifying the felix.auto.start.1 (or 2) property in the config.properties file. For more information on configuring Felix, refer to Felix' usage document.
When editing this property, the bundles can be relative or absolute file paths to the bundles you want to auto load. Also don't forget to put the line continuation marker "\
" and the end of each line except the last one. In figure 13 you can see the default configuration that is shipped with Felix.
...
Now that we are able to launch Felix as a Java Application we can use the debugging and profiling features built into of NetBeans. Future tutorials will go into more detail on how to do this.
...
This document has presented one way in which you can integrate Felix inside of with NetBeans. For any questions or feedback, feel free to send an email to rdjackson at gmail dot com or on the Felix mailing list users at felix dot apache dot org.