DUE TO SPAM, SIGN-UP IS DISABLED. Goto Selfserve wiki signup and request an account.

...
If you want to use the Felix trunk, follow the instructions on the Felix web site to checkout and build the trunk. The Felix binaries are created in the "main" project directory. We will copy these files into our project later.
...
First launch NetBeans. Then click on "File->New->Project..." menu entry as shown in Figure 1.
...
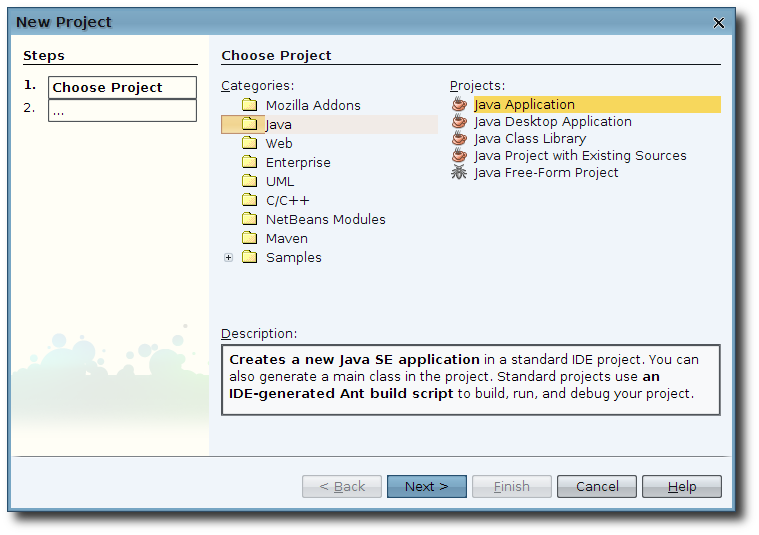
This action will launch the project creation wizard. From the "Categories" list choose "Java" and from the "Projects" list choose "Java Application" as shown in Figure 2, then press the "Next >" button.
Enter the project name (Felix for example), select your project directory, and uncheck the "Create Main Class" check box then press the finished button. See Figure 3.
...
| No Format |
|---|
cp -r ./* /project path/ |
Where "/project path/" is the path to your project directory.
...
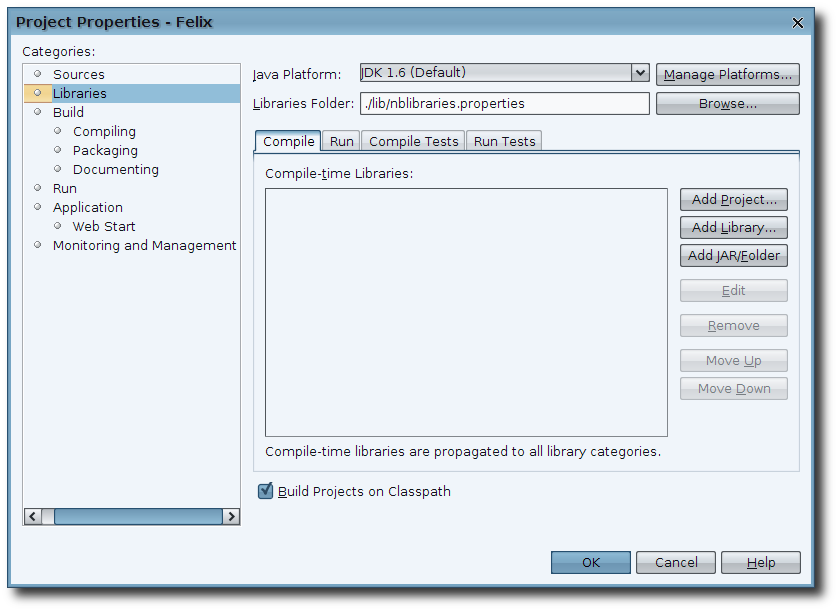
This will bring up the project properties dialog. Select Libraries as shown in Figure 5.
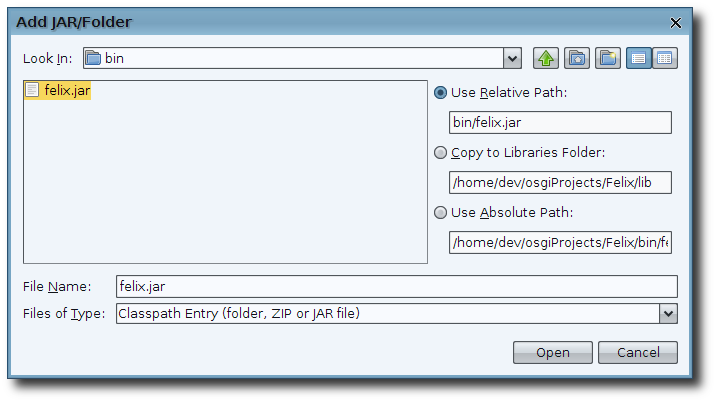
Now we want to press the "Add JAR/Folder" button and navigate to your project directory/bin and select the "felix.jar" as shown in Figure 6. NOTE: Make sure the "Use Relative Path" radio button is selected. Then press the "Open" button.
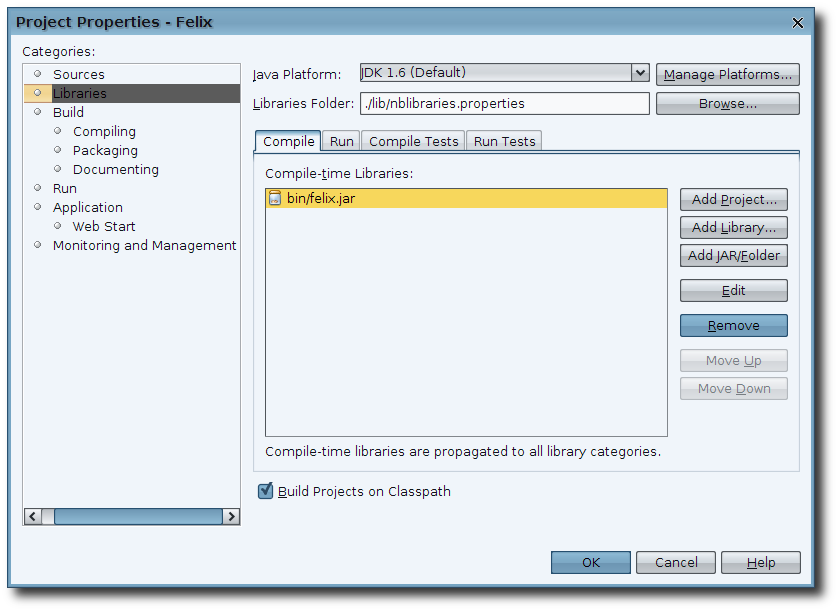
Your libraries panel should now look like what is shown in Figure 7. You can now press the "OK" button.
At this point the red exclamation point should should disappear and now we can run Felix. Right click on the project node and select the "Run" menu item as shown in Figure 8.
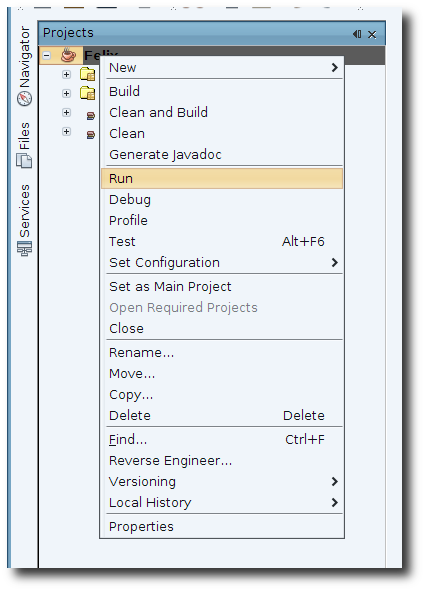
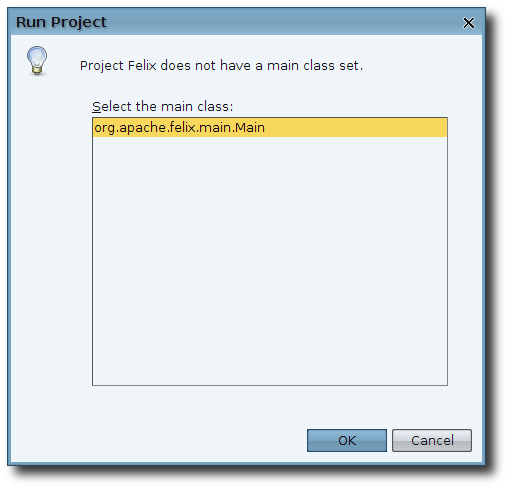
When you do this the "Run Project" dialog will pop-up with a list of all class files with a main method. In our case this will only show the "org.apache.felix.main.Main" class so we select that and press the "OK" button. The "Run Project" dialog is shown in Figure 9.
After you press the "OK" button in the "Run Project" dialog, Felix will be launched and the output window will open with the Felix command line tool running as shown in Figure 10.
...
Now that our project is all set up, you only have to select the Run menu item from the project context menu to re-launch Felix. Or if you prefer, if you set Felix as the main project, then you can use "Run" menu on the main menubar.
...
At this point, you may want to make some changes to the way Felix is configured. In NetBeans you will have to open the "Files" view. Expand the Felix folder and then the "conf" folder as shown in Figure 11. NOTE: When you do this the first time the cache folder will not be there. If you decide to make the configuration changes shown in the next section then it will be created the next time you run Felix.
...
Felix stores profiles and deployed bundles inside a cache. Normally this cache is located at "$userhome/.felix". It is possible to change this location in order to clean it quickly and also to keep your development cache separated from other Felix-based applications you may be running on your computer. You may also want to set a default profile so you don't have to enter it every time you launch Felix.
Open the configuration file, called "config.properties". Then, add a new line with "felix.cache.dir=cache" (see Figure 12). And if you want to set a default profile, uncomment the "felix.cache.profile=foo" line and change it to what you want (Figure 12). To clean your cache, just delete the cache directory.
...
The next time you run Felix, the cache directory will be created with in your project. To verify that it did or if you want to clean it use the "Files" view to expand the Felix folder; you should now see a cache folder that was not there before. You can refer to Figure 11 which displays the cache directory from a previous execution of Felix.
...
Often you will want Felix to automatically deploy some bundles that you need for your development. You can do this by modifying the "felix.auto.start.1" (or 2) property in the "config.properties" file. For more information on configuring Felix, refer to Felix' usage document.
...