DUE TO SPAM, SIGN-UP IS DISABLED. Goto Selfserve wiki signup and request an account.

...
The first thing you do is to create a folder on you disk into which you will download the TUSCANY distribution.

Next you download the latest release distribution. Launch your browser and enter one of the
following URL's.
Latest Release - http://cwiki.apache.org/TUSCANY/sca-java-releases.html
Download both the bin zip as well as the src zip to the folder that you created on your disk. Once
you completed the download you should see the following on your disk.

Next you unzip the bin zip in place, you should see the following folder file structure on your disk
after unzip is complete.

Setup Eclipse for Tuscany
Start Eclipse and create a User Library to contain the TUSCANY runtime jar's as well as their
depending jar's.
From the menu bar select Window and then Preferences... . The Preferences dialog will appear,
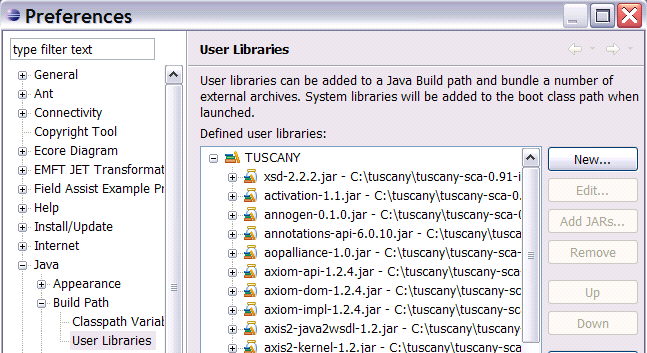
in its left navigation tree select Java, followed by Build Path, and followed by User Libraries.
Select the New... pushbutton on the right of the New Libraries dialog to create a new user library.

The user library created is empty, select the Add JARs... pushbutton on the right to add all the
jar's from your Tuscany installation lib folder. When completed all the jar's will appear under the
TUSCANY user library.
Since some of you maybe interested in debugging also the Tuscany runtime code we will attach
the Tuscany source to the Tuscany runtime jar in the following step. In the User Libraies dialog
scroll down until you see the Tuscany runtime jar and select its Source attachment.

Select OK to complete this and the Preferences dialog, and you are done with the Tuscany setup
for Eclipse.
Select the Edit... pushbutton on the right and in the Edit dialog use the External File... pushbutton
to the select the Tuscany src zip that we downloaded earlier.
