Members are people within your organization who do not have access to the platform. From the Quick access menu click on members. This will launch the manage member page.
Add Members
Click the blue +create new member icon at the bottom-right of the page to create a new member.
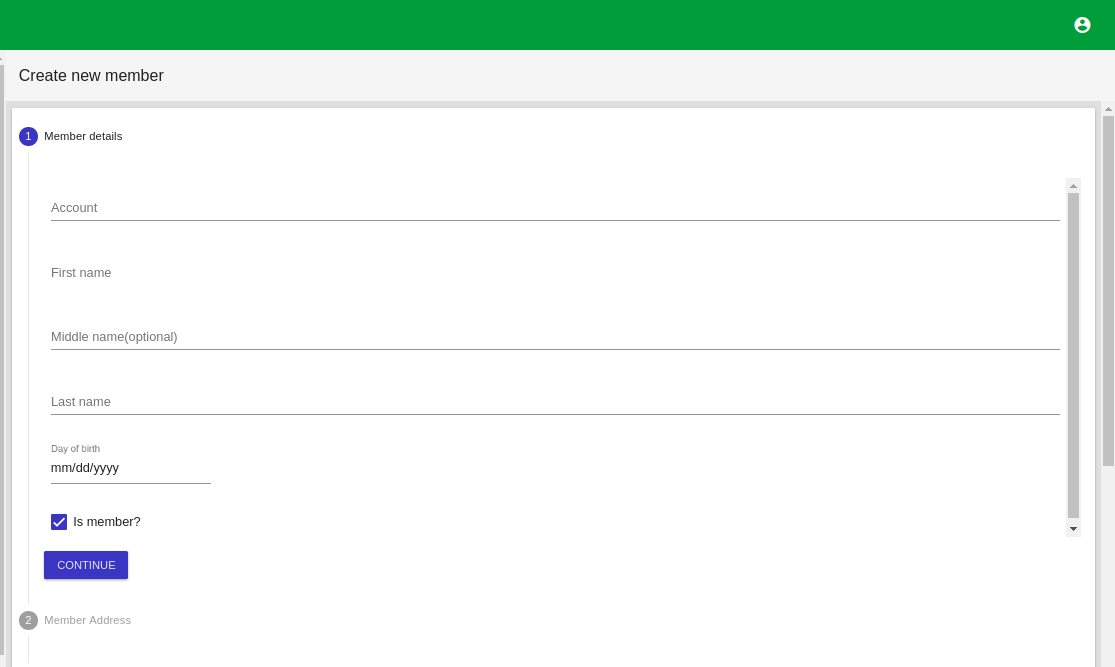
Complete member details
Enter member’s Account number
First Name
Middle Name (optional)
Last Name
Date of birth
Uncheck the checkbox if the member your creating is not part of your organisation.
Click on CONTINUE
Enter member Address:
Street
City
Postal code (optional)
Country
Region (optional)
Click on CONTINUE
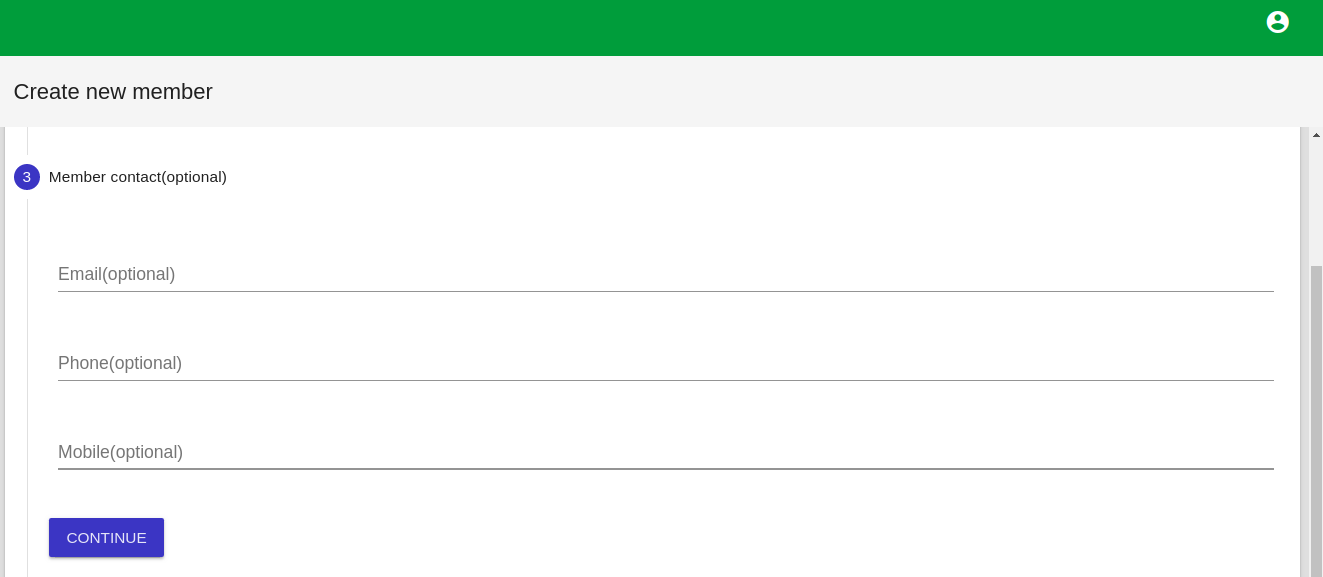
Enter member’s contact (optional)
Email (optional)
Phone (optional)
Mobile (optional)
Click CONTINUE
Assign Member To Office
Search for appropriate office by typing the name of office in the search field
From search Results choose appropriate office. In the example we use CAMEROON.
Click on Blue SELECT button to select office
If you want to Remove the office you selected, from the Current Selection, Click on the Red DESELECT button against the office.
Click CONTINUE
Assign Member To Employee
Search for appropriate employee by typing the name of the employee in the search field.
From search RESULTS choose appropriate employee In this example we use Berlinda
Click blue SELECT button to select the employee
If you want to Remove the employee you selected, from the Current Selection, Click on the Red DESELECT button against the employee.
Click CONTINUE
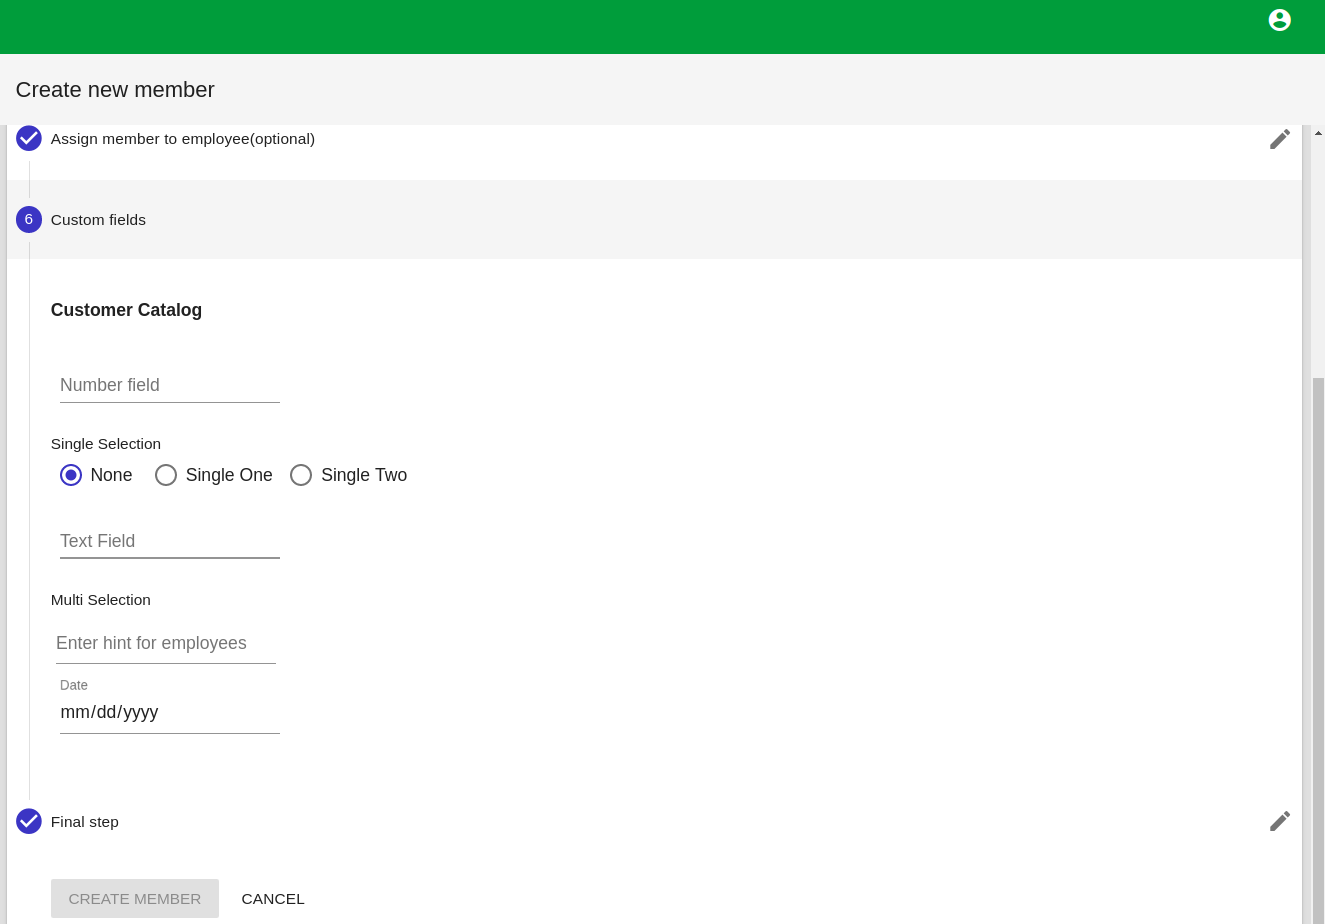
Complete custom fields
Fill the CUSTOMER CATALOG. The customer catalog will vary with different organizations.
Click CREATE MEMBER
View Members
Once you have created members a chart of all members will appear on the manage member screen. The following information will be displayed:
Id (account number)
First Name
Last Name
Current Status (Active or Pending). If pending, open member’s profile to activate employee.
Tip: Use the navigation arrows at the bottom of the page to locate the Member you are searching for. Click the either arrows to move to the next or previous page.
Clicking on the blue SHOW button against Member’s name on the chart will launch that member’s profile.
Edit Member
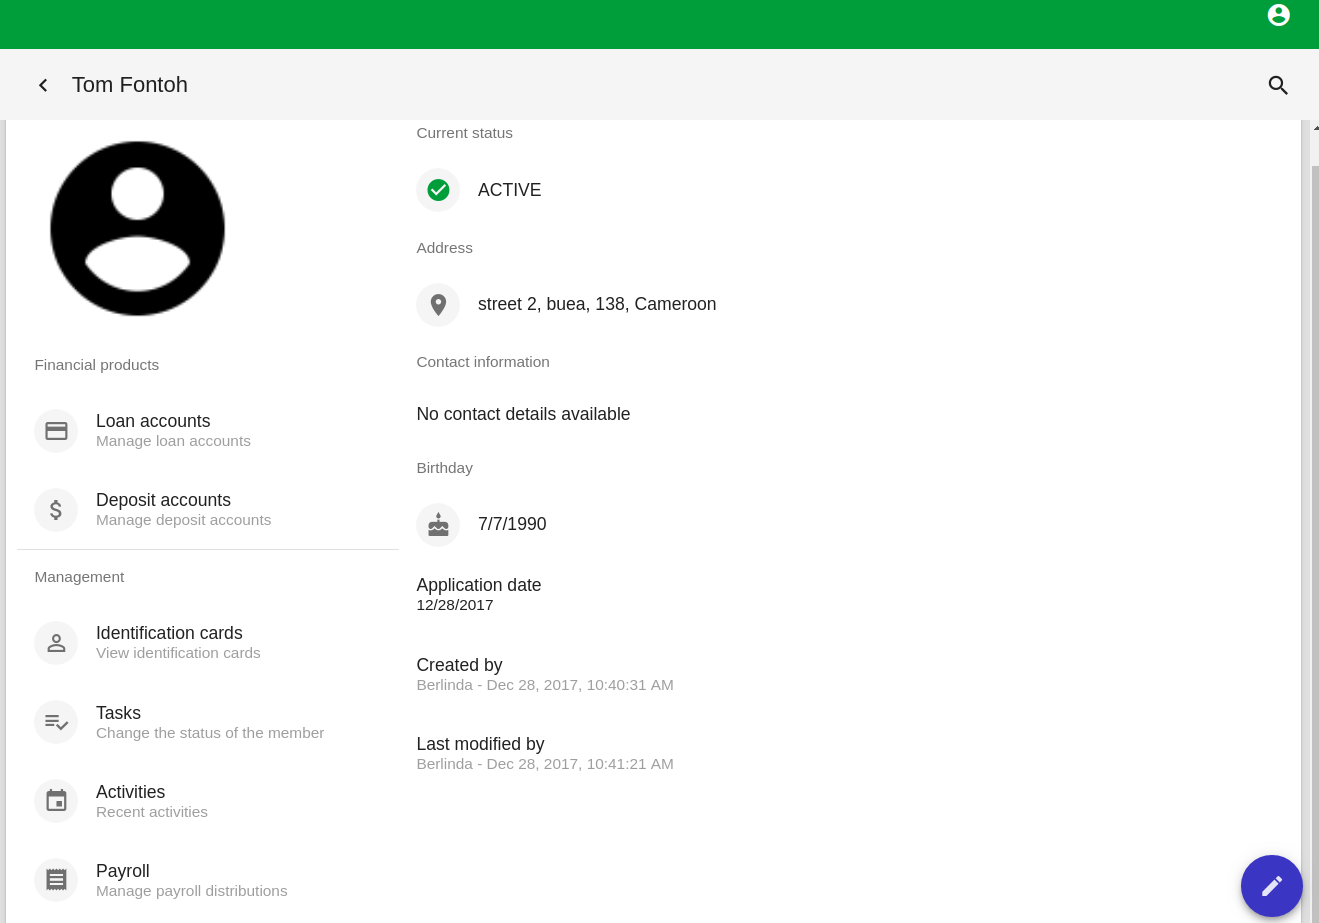
Click the blue Edit member icon at the right-bottom of member’s profile to edit the member’s information.
Once appropriate changes have been made in each of the sections click UPDATE MEMBER.
Manage Loan Accounts Of Members
On the member profile page click on LOAN ACCOUNTS to launch the manage member loans page.
Create New Loan For Member
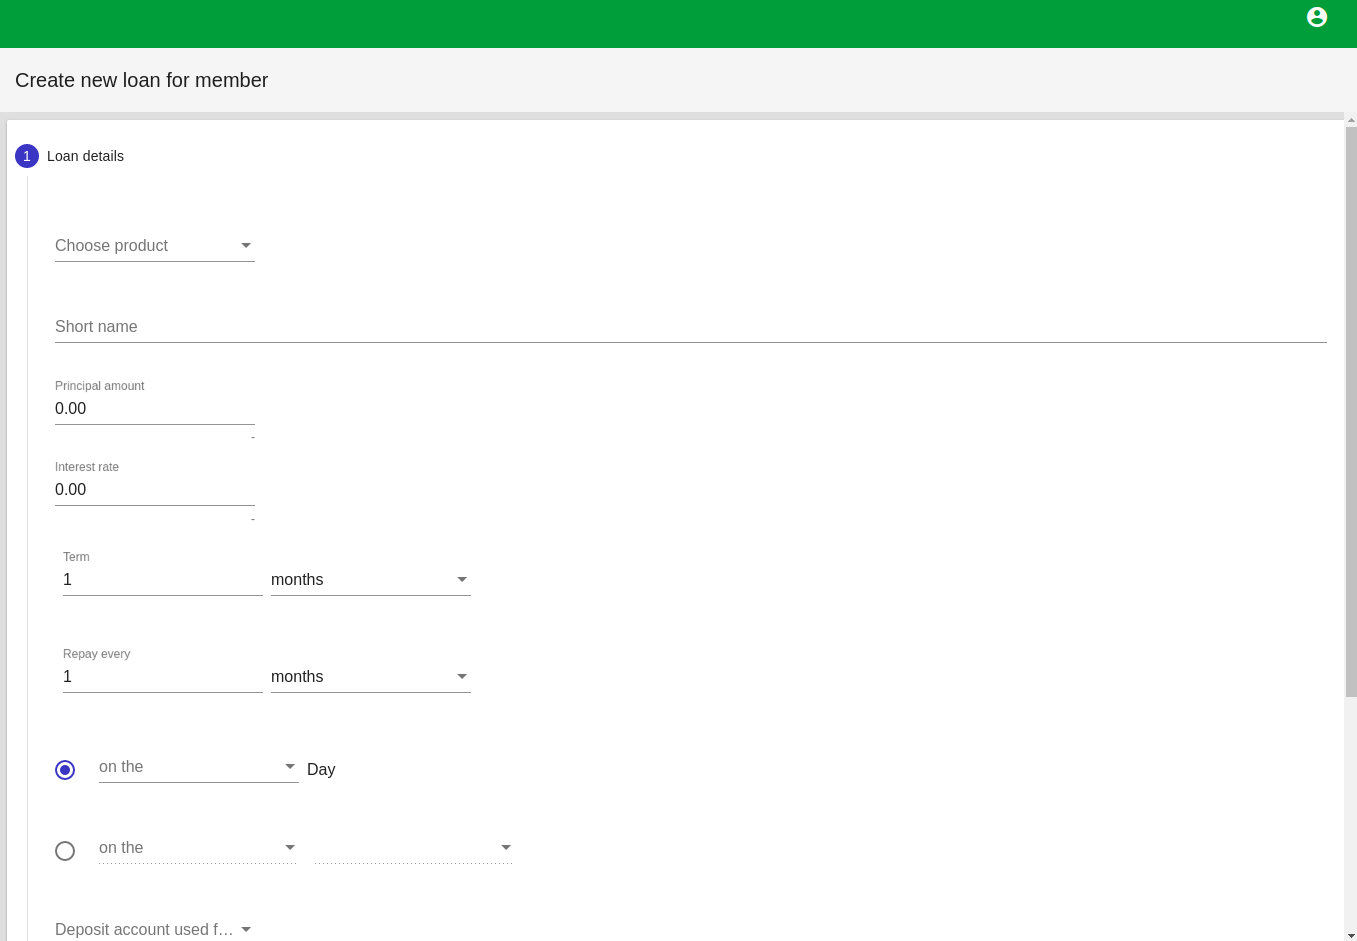
Click on the blue + create new loan for member icon at the right bottom of the page. This will launch the create new loan for member page.
Complete the loan details:
Choose appropriate product from drop down menu.
Short name of loan product
Principal amount of product
Interest rate on loan
In the Term Field, Use the arrows to set the duration of the loan. From the drop down menu set the number and select either weeks, months or years.
In the Repay Every field, Set the Repayment Strategy of the loan. From the drop down menu set the number and select either weeks, months or years.
The format for the on the field will depend on the Term of the loan and loan repayment strategy set above:
A) Loan Term is 2 months and Repayment strategy is every 1 week.
In the on the field select the day of the week you in which you will repay the loan from the drop down menu. In the example we use Tuesday.
B) Loan Term is 2 months and Repayment strategy is every 1 month
Selecting the 1st on the field will permit you to set the day of the month in which you will repay the loan. In the example we use 3rd Day of the month of the month.
Selecting the 2nd on the field will permit you to set the day of the week in the month which you will use to repay the loan. In the example we use First Tuesdays of the month.
C) Loan Term is 10 years and repayment strategy is every 1 year.
Selecting the 1st on the field will permit you set the day of the month which you will repay the loan. In this example we use 3rd Day of the month.
Selecting the 2nd on the field will permit you select the day of the week in the month which you will repay the loan. In this example we use the second wednesdays of the month.
In the in field, select the month of the year you will use to repay the loan from the drop down menu. In this example we use February.
From the drop down menu select the appropriate deposit account used for payment.
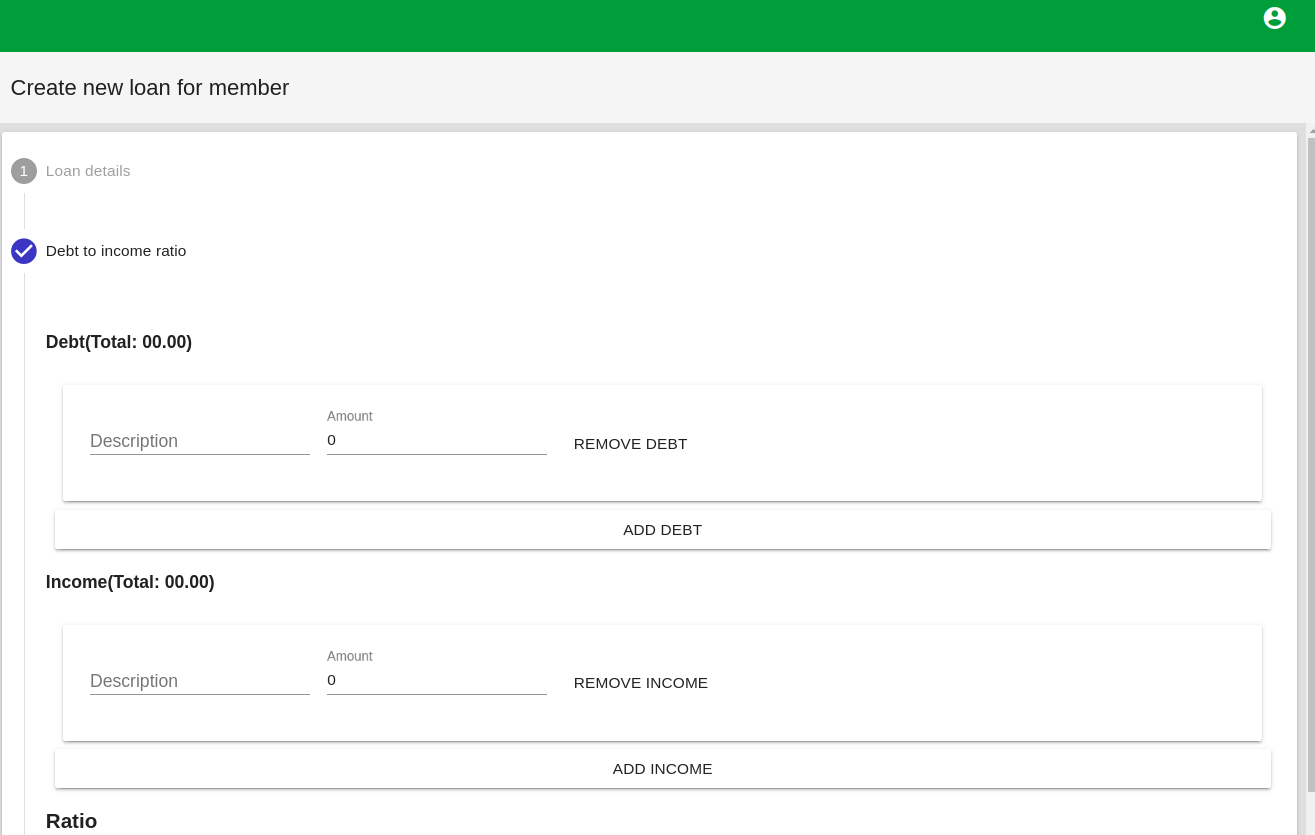
Complete debt to income ratio section
Under Debt field, Click on ADD DEBT
In Description field, enter a description of the Debt
In Amount field enter the Amount of Debt
Click on REMOVE DEBT if member has no debt.
If member has more than one debt click on ADD DEBT to add another debt
Under Income field, click on ADD INCOME
In Description field, enter a description of the Income
In Amount field enter the amount of Income
Click on REMOVE INCOME if member has no more income
If member has more than one income, click on ADD INCOME to add another income.
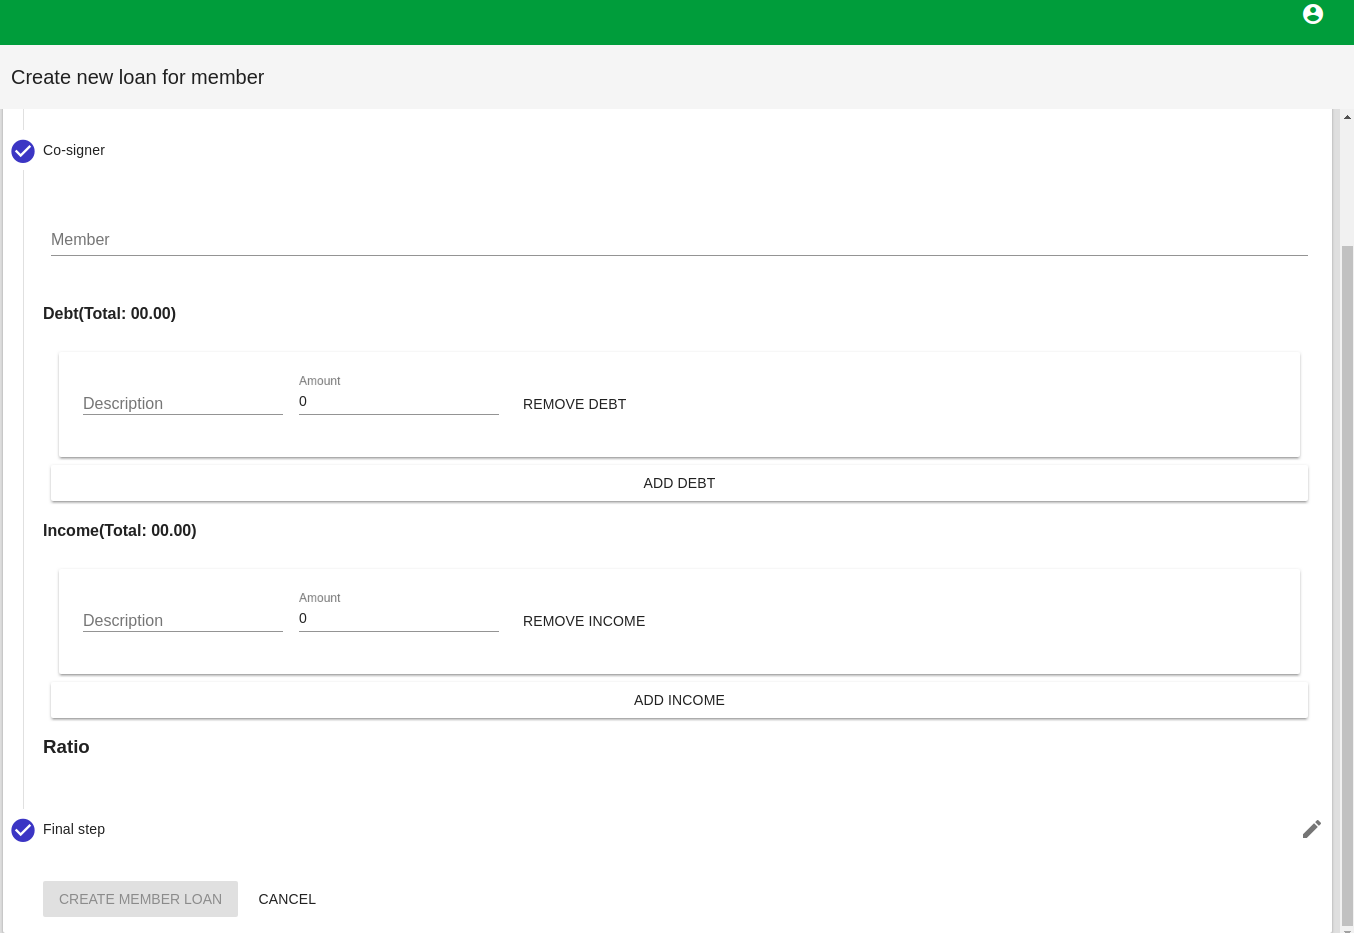
Complete Co-signer section
In Member field enter type members name and select appropriate name from search results.
Under Debt field, Click on ADD DEBT
In Description field, enter a description of the Debt
In Amount field enter the Amount of Debt
Click on REMOVE DEBT if member has no debt.
If member has more than one debt click on ADD DEBT to add another debt
Under Income field, click on ADD INCOME
In Description field, enter a description of the Income
In Amount field enter the amount of Income
Click on REMOVE INCOME if member has no more income
If member has more than one income, click on ADD INCOME to add another income
Click CREATE MEMBER LOAN
View Loan Accounts
A chart of Member loan accounts created will be displayed on the manage member loan page.
The following information will be displayed:
Id
Loan Product Id
Principal
Interest
Current status.
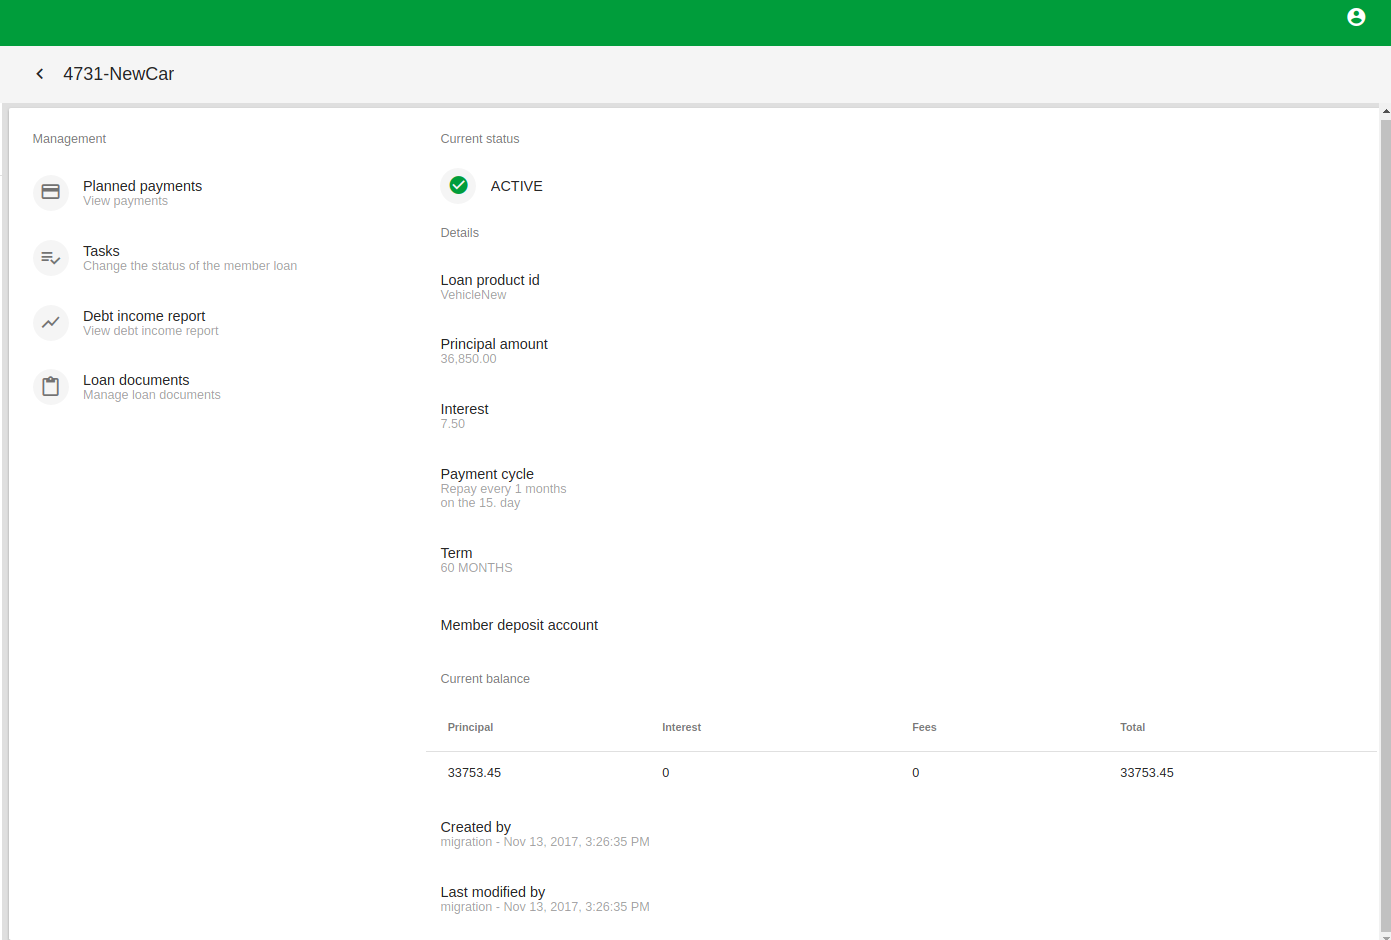
Clicking on the blue SHOW button against a loan account on the chart will launch details of the loan account.
Click on Planned Payments to view payments. This will launch the planned payments page. the following are displayed:
Date
Payments
Interest
Principal
Balance
Click the drop down menu against the Start Date field to Edit plan Payments
2)Click on Tasks to change Status of the member loan. this will launch the Task page.
Click on the Blue CLOSE button to change the status of the member loan to Close.
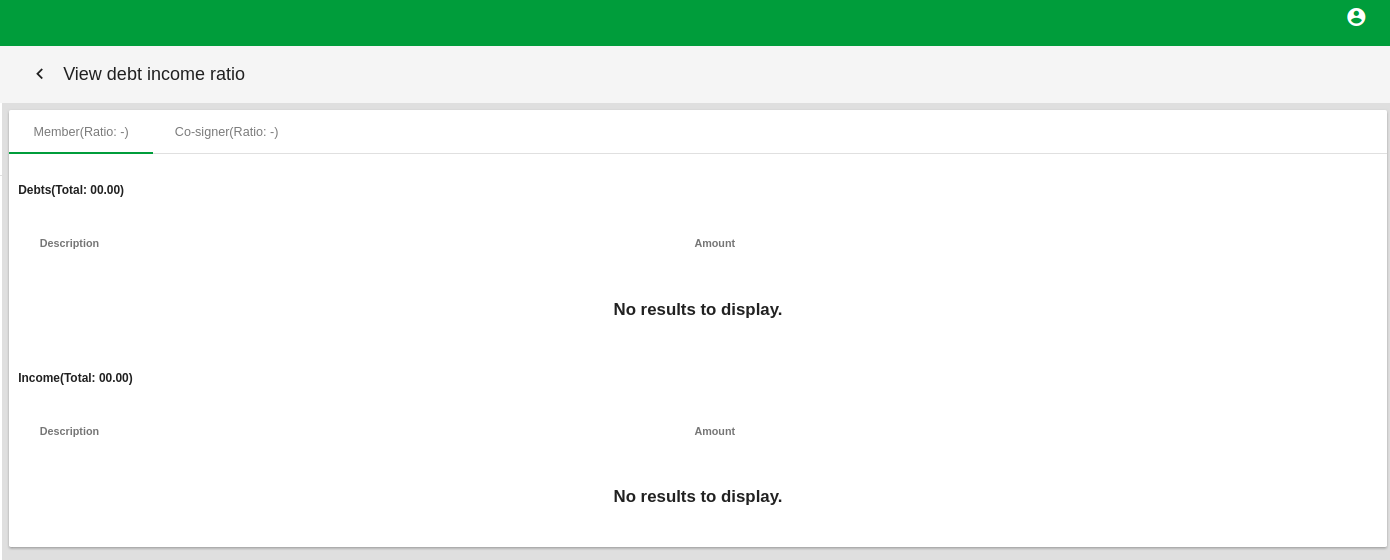
3) Click on Debt Income Report to View the debt Income Ratio of the Member and the Co-signer.
4) Click on Loan Documents to manage the loan documents. This will launch the Manage Documents page.
Click the blue +Create new document icon at the left-bottom of the page to create a new member loan document.
In Description field enter a description of the document
Click on CREATE DOCUMENT
View Documents
A chart of loan documents created will be displayed on the manage documents page. The following will be displayed:
Description
Created by
Created on
Click on the blue SHOW button against a document to View details on the document.
Click on Edit icon at the right top of the page to edith document
Click on Delete icon at the right-top of the page to delete document
Click on blue Lock button to lock the document
Click on Upload Page icon at the right bottom of the page to upload Scanned loan documents from your computer.
Complete the following fields:
In Page Number field enter page number of the document you want to upload
In Select field, Click on BROWSE button to select appropriate page from your computer
Click on CREATE PAGE
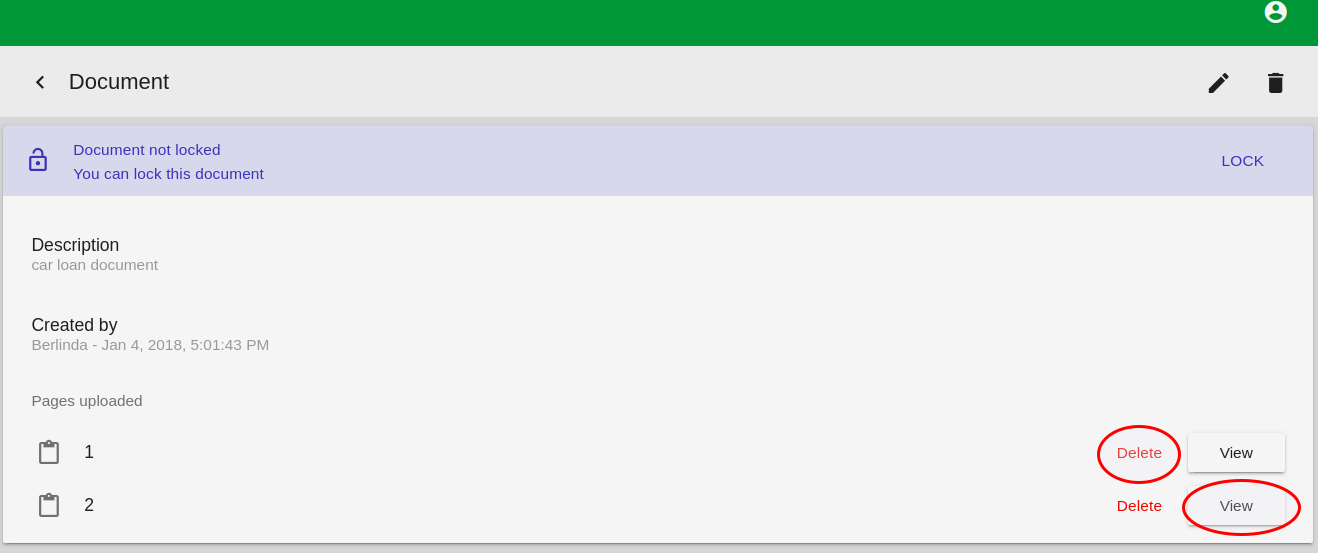
All pages created will appear on the Document page.
Click on View Button to view page uploaded
Click on Delete button to Delete a page uploaded
Manage Deposit Accounts Of Members
On member profile page, click on Deposit Accounts to launch the manage member deposit accounts page.
Create New deposit Account For Member
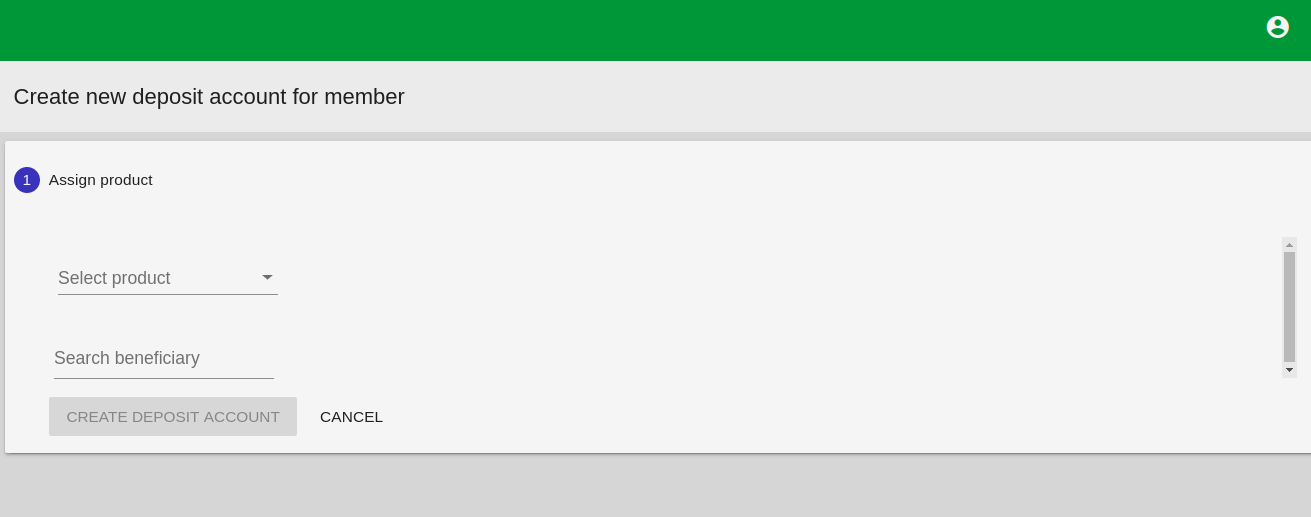
Click the blue +Create New deposit account account for member at the right-bottom side of the page. This will launch the Create New Deposit Account for Member Page.
Complete the following fields:
Select product from drop down menu.
Search beneficiary by typing Beneficiary's name. ( beneficiaries should be members of your organization)
Click on create DEPOSIT ACCOUNT
View Deposit Accounts
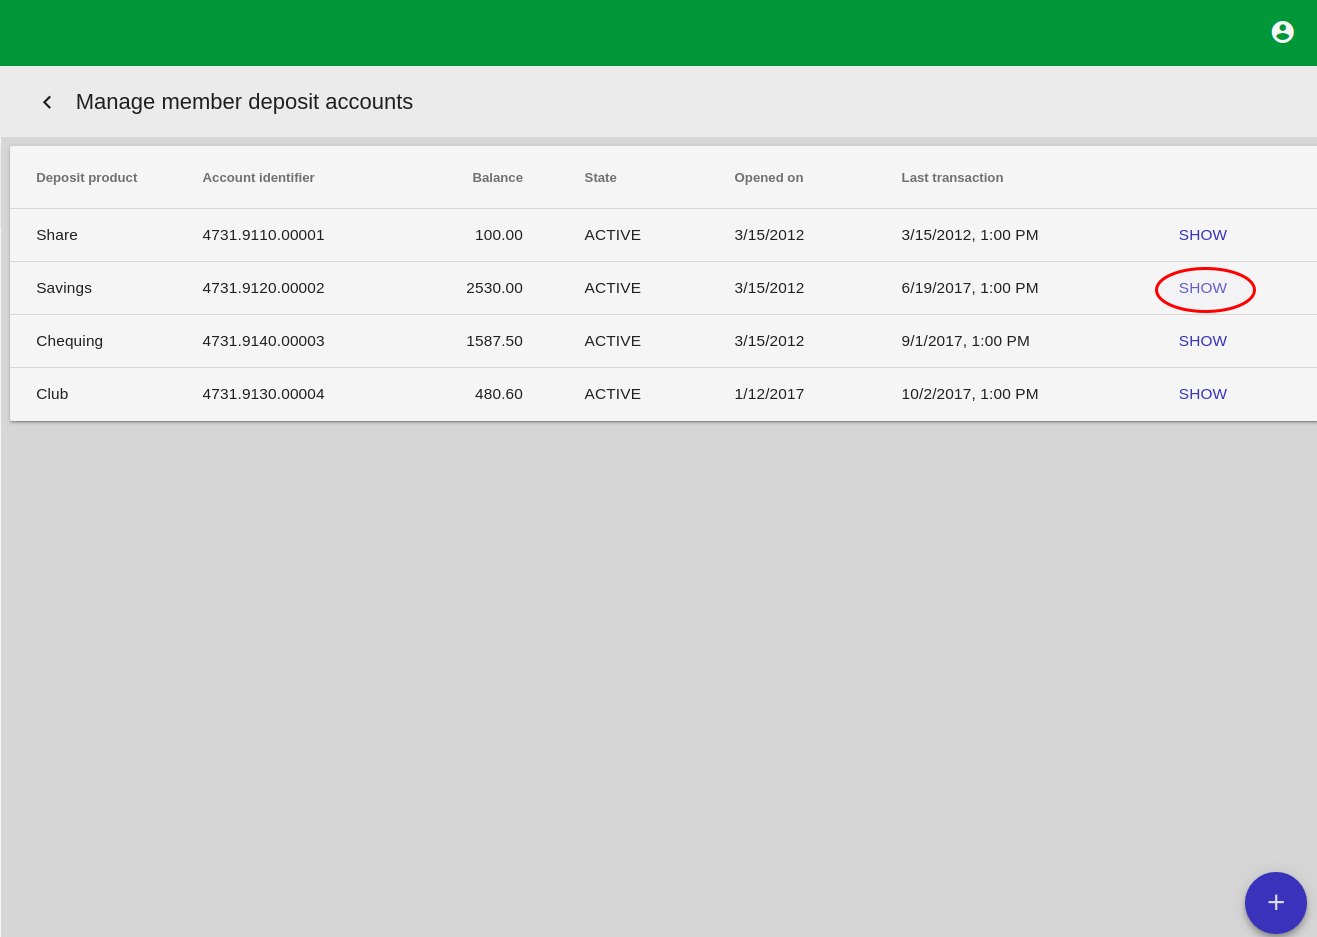
A chart of all deposit accounts created will be displayed on the manage deposit accounts for member page.
The following information will be displayed:
Deposit Product
Account Identifier
Balance
State
Opened On
Last Transactions
Clicking on Blue SHOW button against a deposit account on the chart will launch details of the Deposit Account.
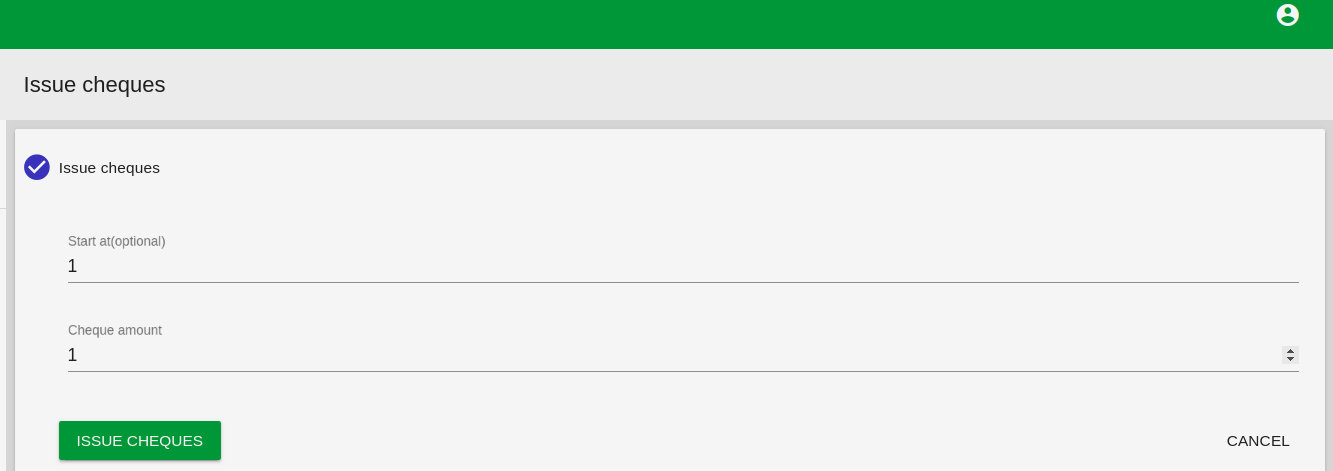
Click on the Issue Cheques icon at the right-top of the page. This will launch the issue cheques page.
Complete the following fields:
Start at (optional)
Cheque amount
Click ISSUE CHEQUES
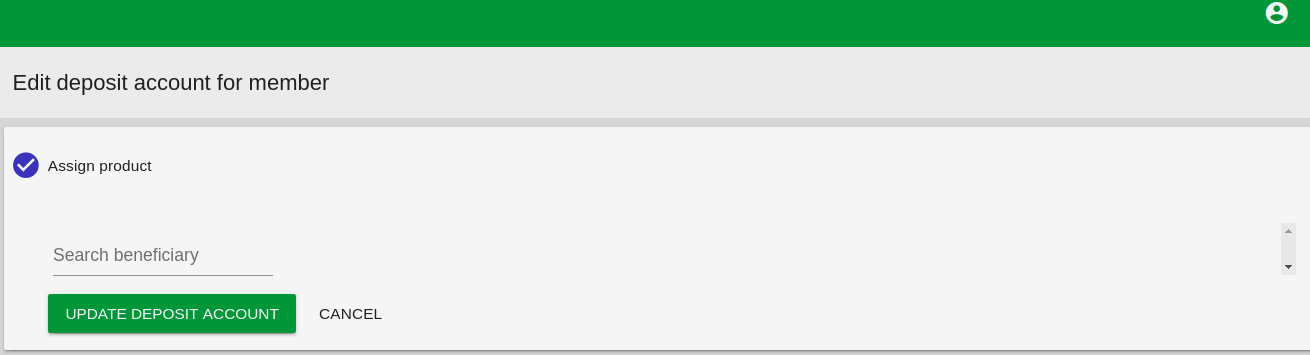
Click on blue Edit Deposit Account icon at the right-bottom of the page. This will launch the Edit Deposit Account for Member page.
Search for appropriate beneficiary
click on UPDATE DEPOSIT ACCOUNT.
View Identification Card
On Member Profile Page, click on Identification Cards to manage identification cards.
Click on blue +Create New Identification Card Icon at the Right-bottom of the page.
Complete the following fields:
In Number field, Enter Identification card number.
In Type Field, Enter the type of identification card used.
In Expiration date field, Enter Date of expiration of the identification card.
In Issuer field, Enter name of Authority who Issued the card.
Click CREATE IDENTIFICATION CARD.
A Chart of Identification cards Created will be displayed on the manage Identifications cards page.
The following will be displayed:
Number
Type
Issuer
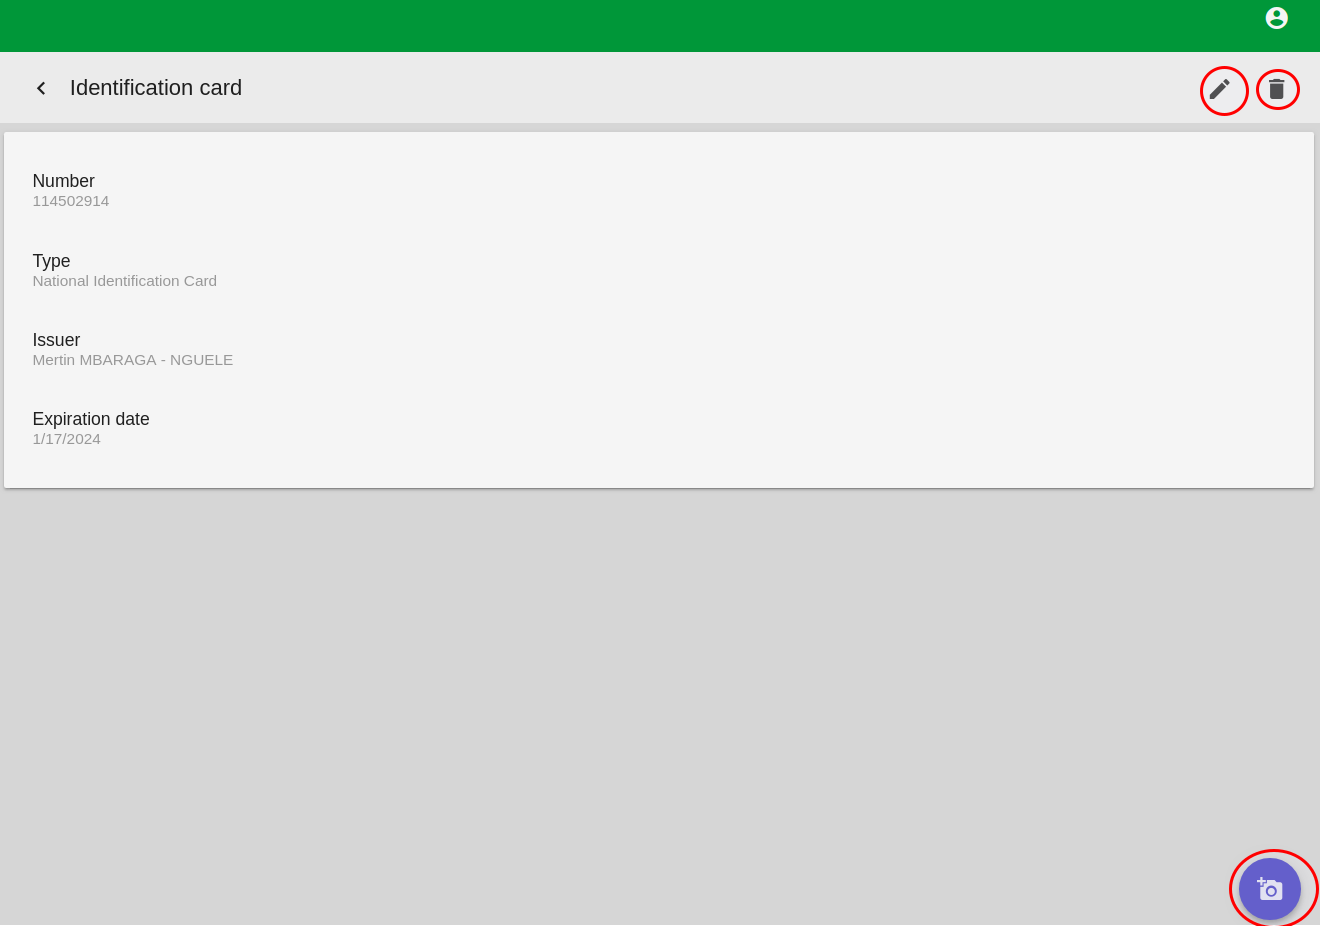
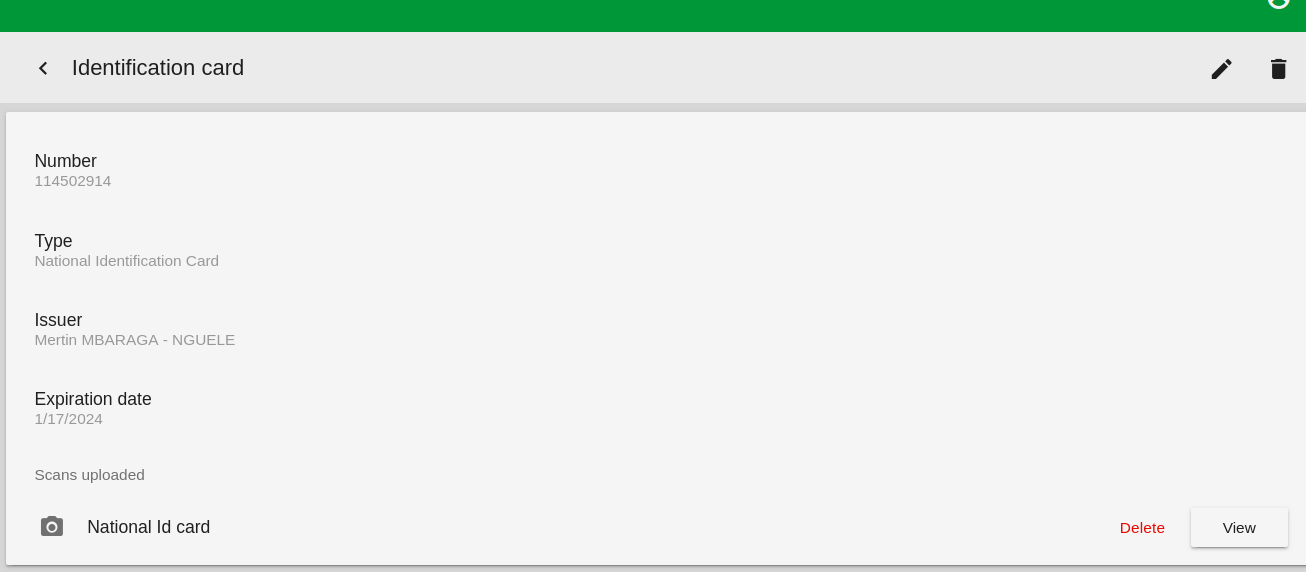
Click on blue SHOW Button to open the detail page of the identification card.
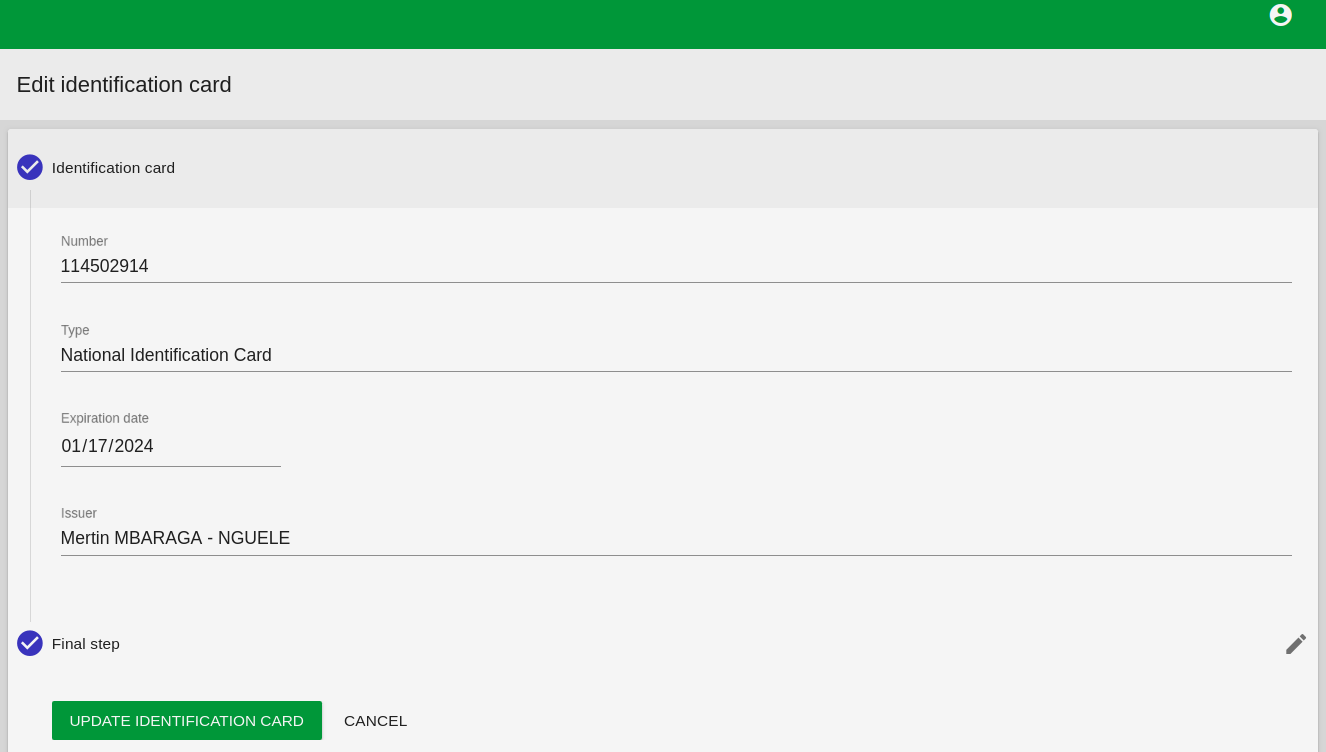
Click on Edit Identification Card Icon athe the Right-top of the page. This will launch the Edit Identification Card Page.
Edit the information in the various fields to suite the identification card you are using and click on UPDATE IDENTIFICATION CARD
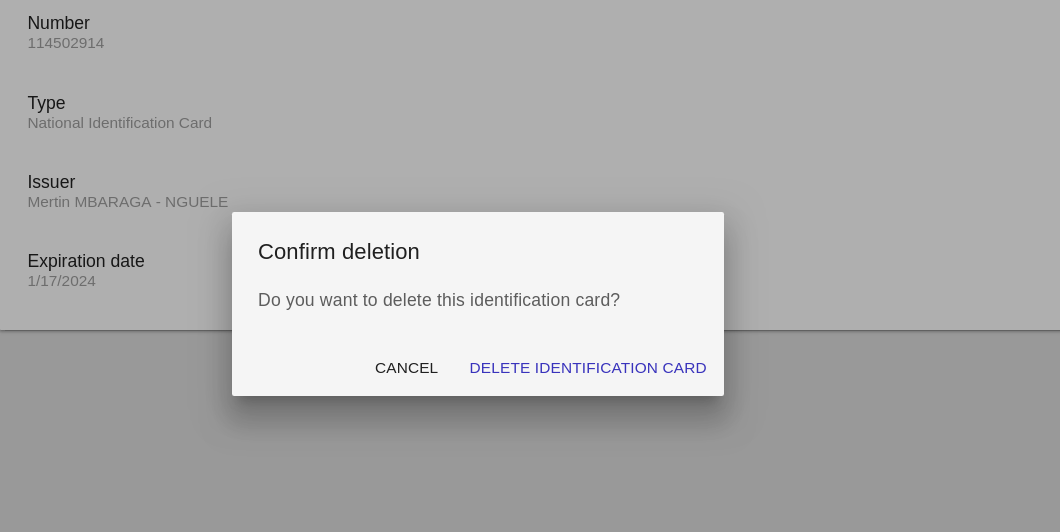
Click on Delete Identification card icon at the right-top of the page to delete the identification card used.
Confirm delete action on the pop up menu that appears
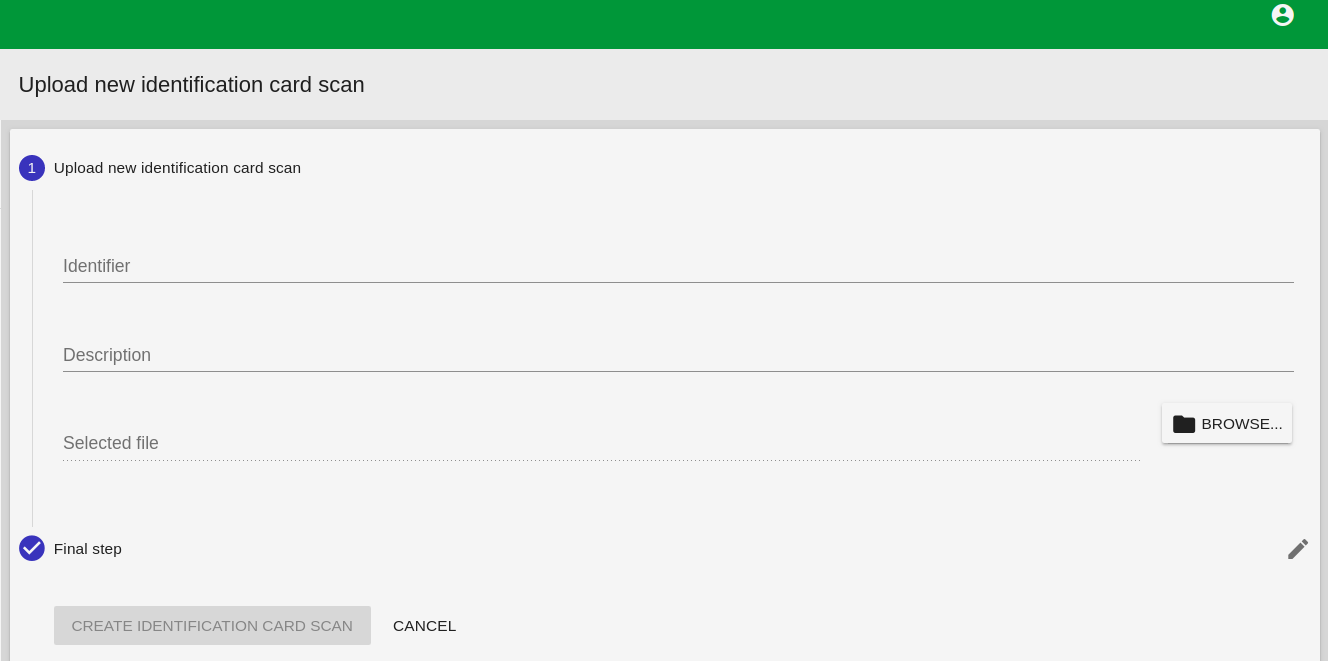
Click on Add Identification Card Scan icon at the right bottom of the page. This will launch the Add Identification Card Page.
Complete the following fields:
In Identifier field Enter a name or number to identify the scan in the system.
In Description field add a Description of the scanned identification card
Select file from your Computer by Clicking on BROWSE button
Click on CREATE IDENTIFICATION CARD SCAN.
A list of Scans Uploaded will be Displayed on the Identification card details page.
Click on Red Delete button to delete Scan
Click on View button to view scan
Manage Member Status
Click on Tasks on the member profile page to change the status of the member
On the Tasks page you can either LOCK or CLOSE a member.
View Recent Activities
Clicking on Activities on the Member Profile page to View Recent activities carried out on the member account.
A Chart of Latest Activities will be displayed on the Activities page.
Manage Member Payroll
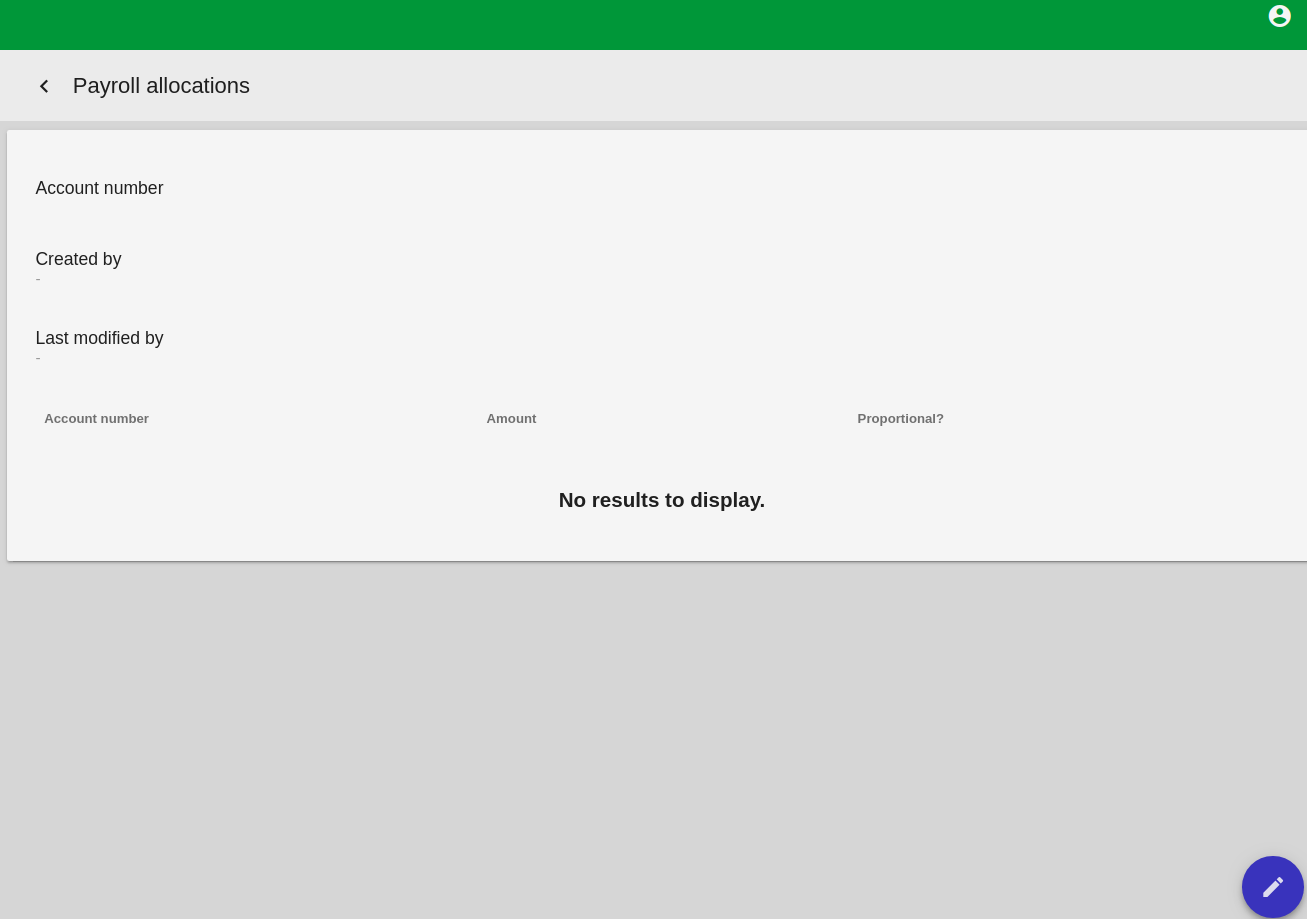
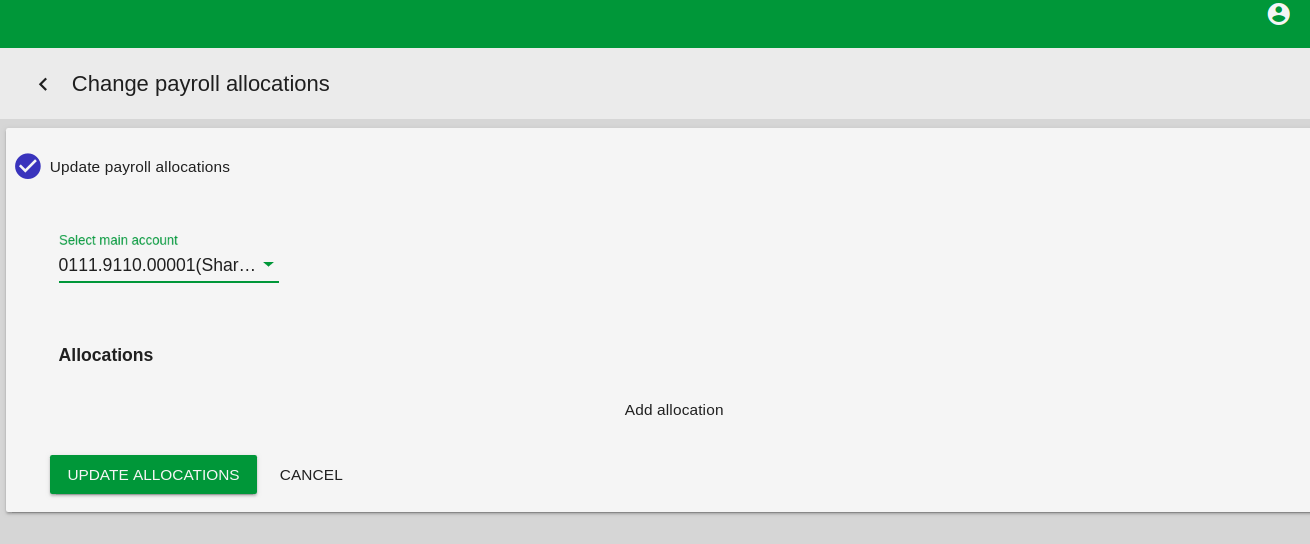
Click on Payroll on the Member Profile Page to Manage Payroll Distributions. This will Launch the Payroll Allocations Page.
Click on blue Edit Payroll Distribution icon at the bottom of the page
Select main account by clicking on the drop down menu
Click UPDATE ALLOCATIONS
Manage Tasks
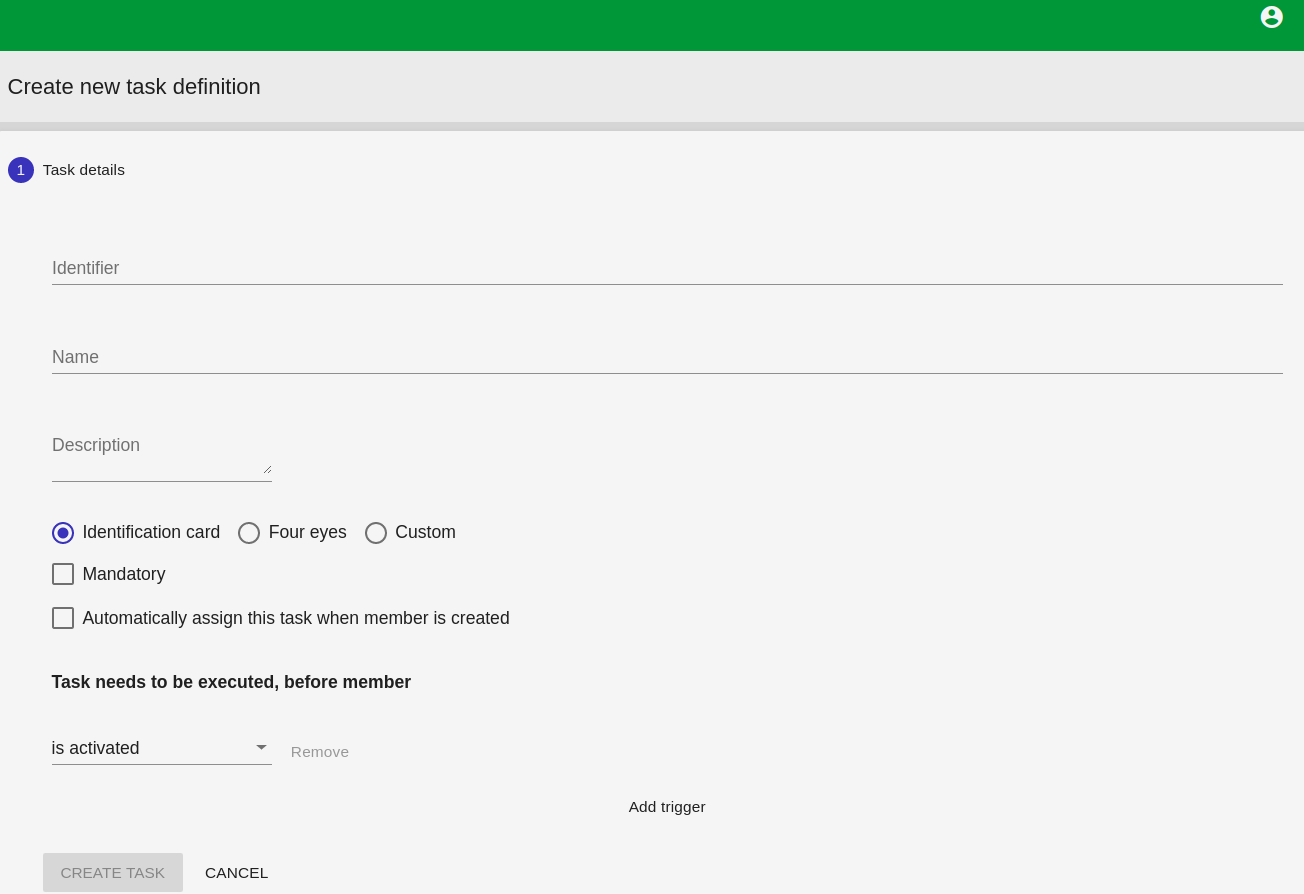
On The Manage Members Page Click on Tasks. This will launch the Manage Tasks page. Click +create New Task icon at the right-bottom of the manage task page.
Complete the Following fields:
In Identifier field, enter a set of letter or figures to identify the task on the system.
In Name Field, enter the name of the task you are creating
In Description field, enter a description of the Task
Choose the Type Of task by selecting Either Identification Card, Four eyes or Custom
Select Mandatory if task is mandatory for members
Select Automatically assign this task when member is created (optional)
In Tasks need to be Executed, before member field, select either is activated, is unlocked, or is reopened from the drop down menu. Click on ADD Trigger if you want to add another field. Click on Remove to remove a Trigger
Click on CREATE TASKS
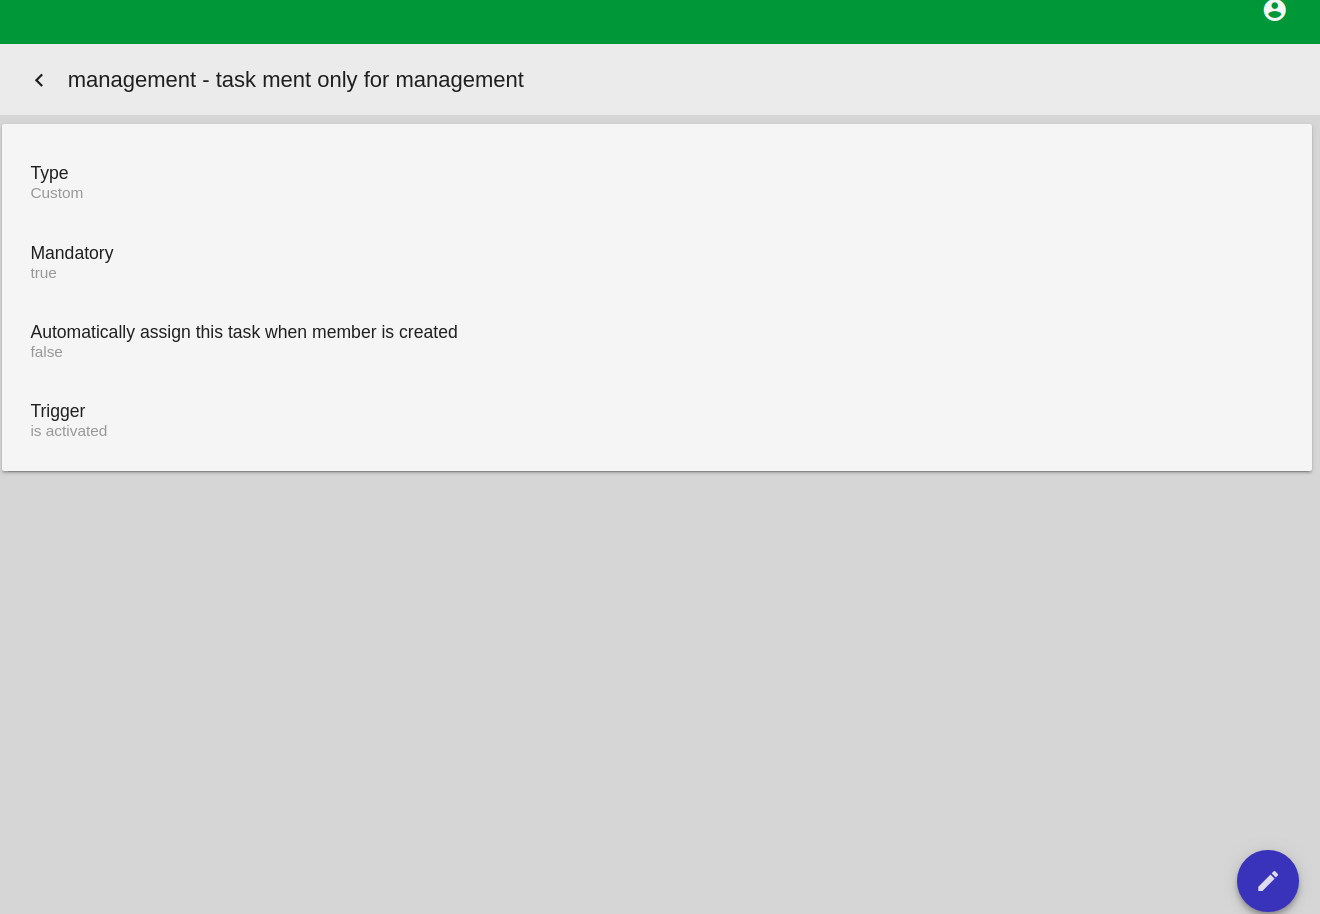
A Chart of all Task Created will Be displayed on the Manage Tasks Screen
Click on show against a task to open tasks Details.
Click on blue Edit tasks icon at the bottom of the page to edit a task.
Click on UPDATE TASKS after Editing
Manage Custom Fields
On the Manage Members page, Click on Custom Fields. The Custom fields page will be launched.
Click on Delete icon at the right top side of the page to delete the catalog.
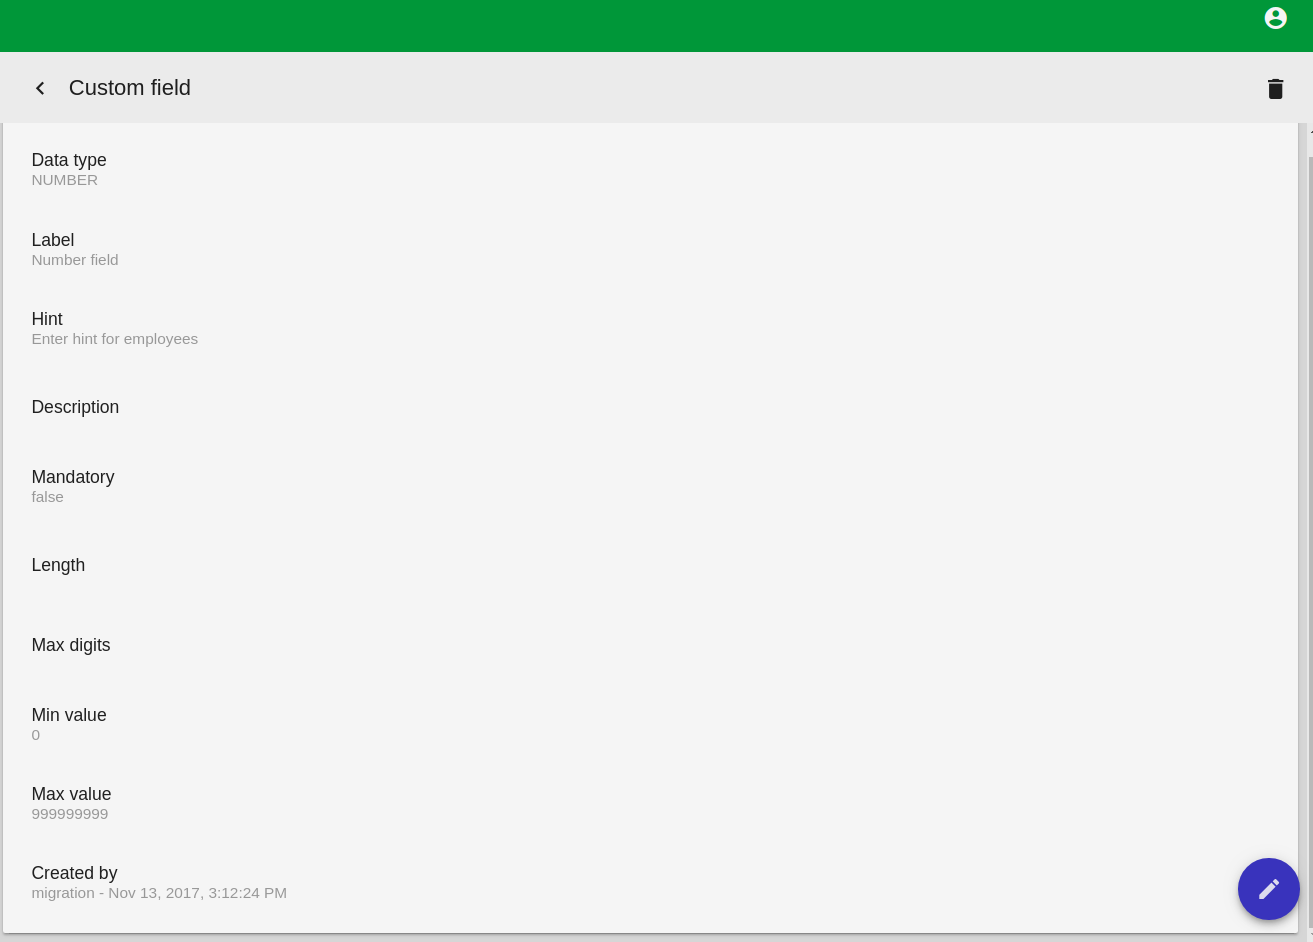
Click on SHOW button against a custom field to open the custom field details page.
Click on Delete icon at the top of the page to delete field
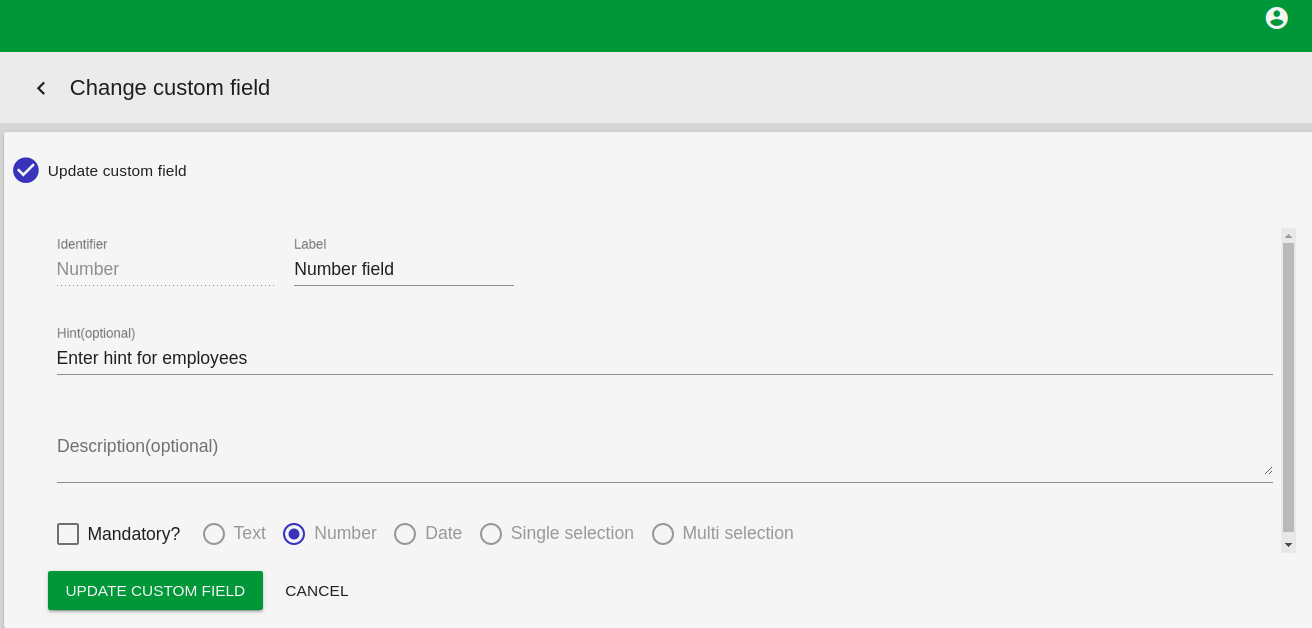
Click on blue Edit field icom at the right bottom of the page to edit the Field. This will launch the change custom Field page
Edit the following Fields:
Label
Hint (optional)
Description (optional)
Select Mandatory if the field is mandatory to members.
Click UPDATE CUSTOM FIELD
Next Page : Loan Product