In order to increase the security of our CI system, we classify jobs and nodes as either unrestricted or restricted:
- Unrestricted: Code and environments that consists of or runs arbitrary non-verifiable code (like Pull Requests). This code and the environments they are running on, have to be considered potentially malicious or infected and are thus ineligible for any actions that produce outgoing data streams. Ideally, these environments would be unable to make any outbound connections and be blocked to have any outgoing data transfer. Considering this is not possible because we rely on sources from the internet, we are reducing the restrictions to the following: The creation of any user-facing artefacts like package builds or websites is forbidden.
- Restricted: Code and environments that solely consist of code that has been verified by a committer (like our GitHub branches or internal repositories with restricted write access). This environment is considered to be safe or restricted in terms of not running arbitrary code. While this is no guarantee that these environments can not be compromised, the chance is highly reduced due the necessity of a manual review by a committer. These jobs, if run on a restricted environment, are eligible for the creation of package builds or the website.
How to create a restricted jobs
In order to create a restricted job and run it on a restricted node, you have take the following steps:
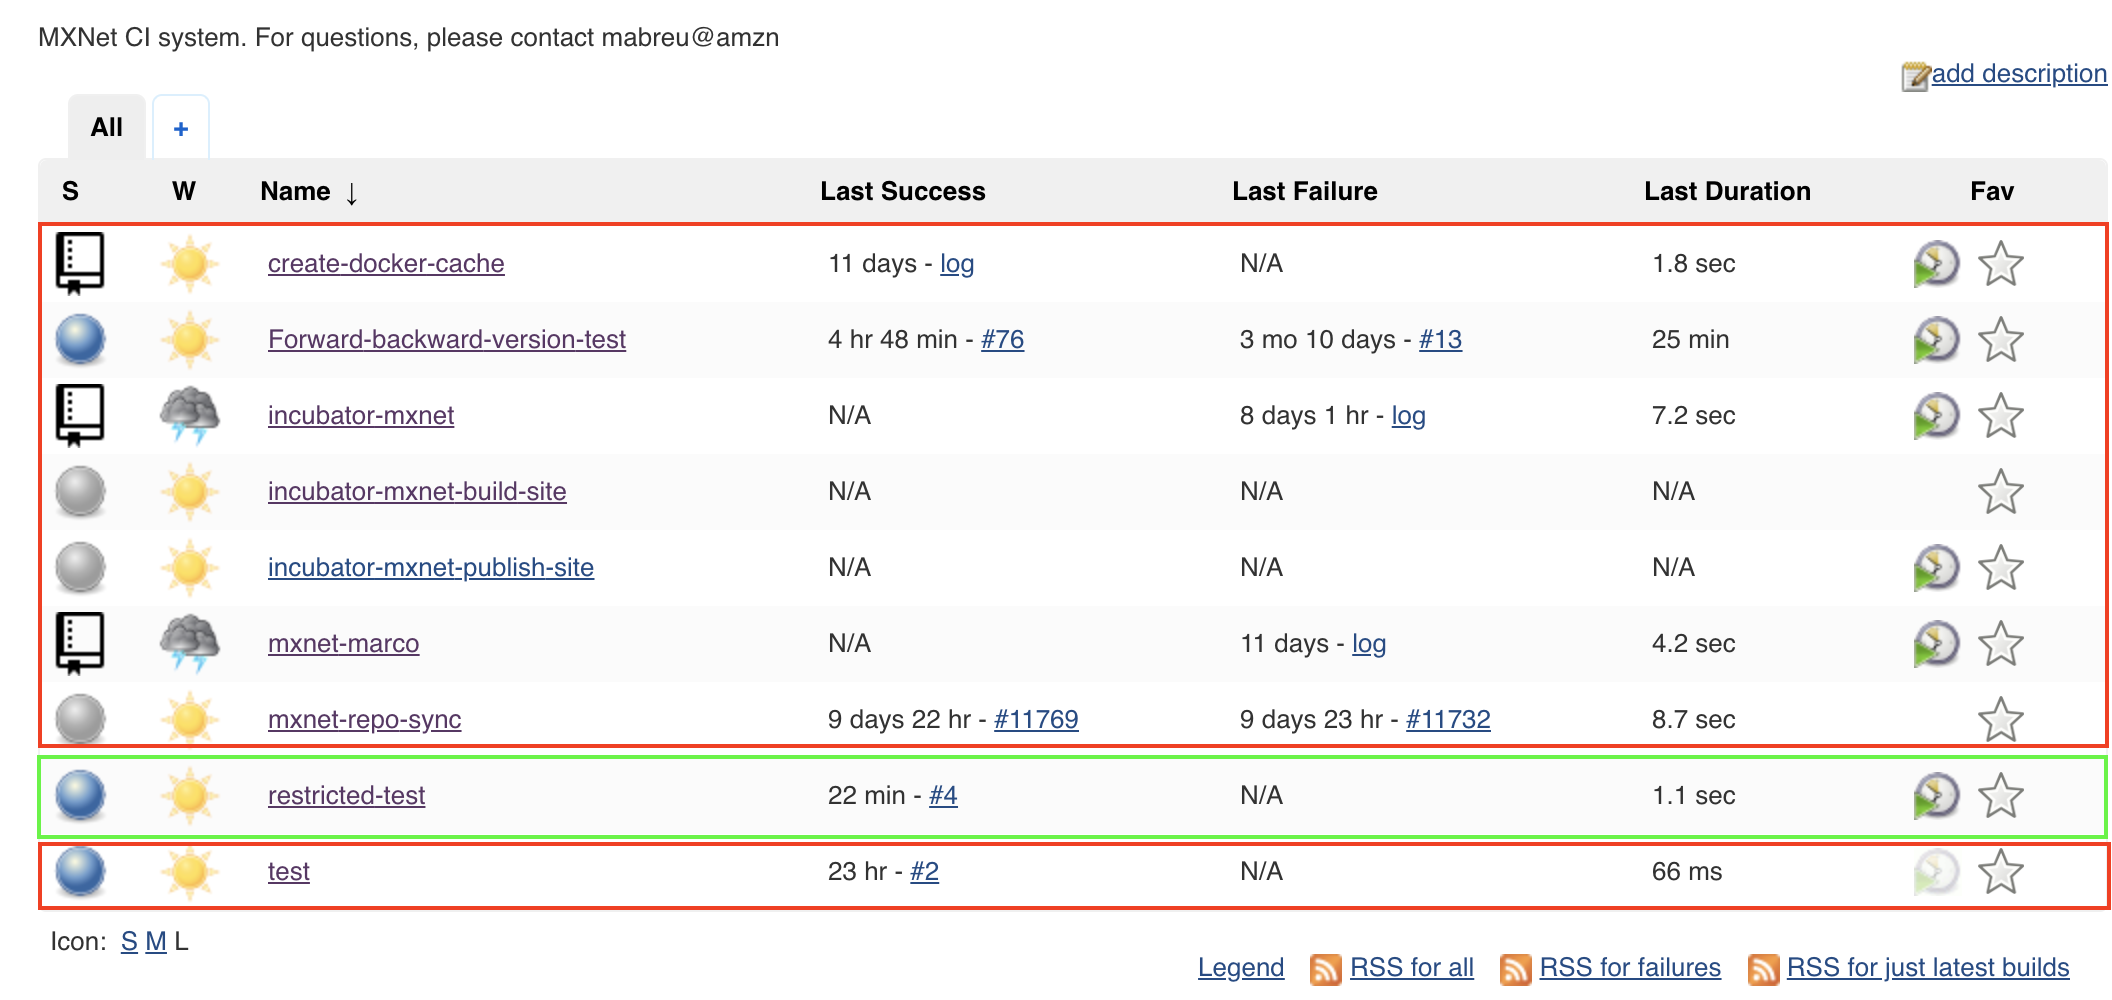
- Create a Jenkins job which starts with the name 'restricted-' (case-sensitive). In the following image, all jobs eligible for execution on restricted slaves are marked in green while all unrestricted jobs are red:
Within your Jenkinsfile, make sure that all nodes start with 'restricted-' (case-sensitive). In the following you see two examples. The green one will be scheduled on a restricted node while the red one runs on unrestricted nodes. Note: Due to security measures, it is not possible mix restricted and unrestricted nodes within the same job.
node('restricted-mxnetlinux-cpu') {
ws('workspace/sanity') {
init_git()
docker_run('ubuntu_cpu', 'sanity_check', false)
}
}
node('mxnetlinux-cpu') {
ws('workspace/sanity') {
init_git()
docker_run('ubuntu_cpu', 'sanity_check', false)
}
}
That's it. Auto scaling will automatically take care that your required slaves will be provisioned.
Background
The enforcement of these restrictions is done using the Jenkins Job Restrictions plugin. Our nodes are created with the following configuration:
Restricted nodes

Unrestricted nodes
