DUE TO SPAM, SIGN-UP IS DISABLED. Goto Selfserve wiki signup and request an account.
Running Hadoop Components
One of the advantages of Bigtop is the ease of installation of the different Hadoop Components without having to hunt for a specific Hadoop Component distribution and matching it with a specific Hadoop version.
Running Pig
- Install Pig
sudo apt-get install pig

create a tab delimited text file using your favorite editor,
1     A
2     B
3     C
- Create a tab delimited file using a text editor and import it into HDFS under your user directory /user/$USER. By default PIG will look here for yoru file. Start the pig shell and verify a load and dump work. Make sure you have a space on both sides of the = sign. The statement using PigStorage('\t') tells Pig the columns in the text file are delimited using tabs.
$pig
grunt>A = load '/pigdata/PIGTESTA.txt' using PigStorage('\t');
grunt>dump A

2013-07-06 07:22:56,272 [main] INFO  org.apache.pig.backend.hadoop.executionengine.mapReduceLayer.MapReduceLauncher - Success!
2013-07-06 07:22:56,276 [main] WARN  org.apache.hadoop.conf.Configuration - fs.default.name is deprecated. Instead, use fs.defaultFS2013-07-06 07:22:56,295 [main] INFO  org.apache.pig.backend.hadoop.executionengine.util.MapRedUtil - Total input paths to process : 1
(1,A)
(2,B)
(3,C)
()

2013-07-06 07:22:56,295 [main] INFO  org.apache.hadoop.mapreduce.lib.input.FileInputFormat - Total input paths to process : 12013-07-06 07:22:56,295 [main] INFO  org.apache.pig.backend.hadoop.executionengine.util.MapRedUtil - Total input paths to process : 1
(1,A)((3,C)(
Running HBase
- Install HBase
sudo apt-get install hbase\*
- For bigtop-0.2.0 uncomment and set JAVA_HOME in /etc/hbase/conf/hbase-env.sh
- For bigtop-0.3.0 this shouldn't be necessary because JAVA_HOME is auto detected
sudo service hbase-master start
hbase shell
- Test the HBase shell by creating a HBase table named t1 with 3 columns f1, f2 and f3. Verify the table exists in HBase
you should see a verification from HBase the table t2 exists, the symbol t2 which is the table name should appear under list
hbase(main):001:0> create 't2','f1','f2','f3'
SLF4J: Class path contains multiple SLF4J bindings.
SLF4J: Found binding in [jar:file:/usr/lib/hbase/lib/slf4j-log4j12-1.5.8.jar!/org/slf4j/impl/StaticLoggerBinder.class]
SLF4J: Found binding in [jar:file:/usr/lib/hadoop/lib/slf4j-log4j12-1.4.3.jar!/org/slf4j/impl/StaticLoggerBinder.class]
SLF4J: Found binding in [jar:file:/usr/lib/zookeeper/lib/slf4j-log4j12-1.6.1.jar!/org/slf4j/impl/StaticLoggerBinder.class]
SLF4J: See http://www.slf4j.org/codes.html#multiple_bindings for an explanation.
0 row(s) in 3.4390 seconds

hbase(main):002:0> list
TABLE
t2
2 row(s) in 0.0220 seconds

hbase(main):003:0>
Running Hive
- This is for bigtop-0.2.0 where hadoop-hive, hadoop-hive-server, and hadoop-hive-metastore are installed automatically because the hive services start with the word hadoop. For bigtop-0.3.0 if you use the sudo apt-get install hadoop* command you won't get the Hive components installed because the Hive Daemon names are changed in Bigtop. For bigtop-0.3.0 you will have to do
Create the HDFS directories Hive needs
sudo apt-get install hive hive-server hive-metastore
The Hive Post install scripts should create the /tmp and /user/hive/warehouse directories. If they don't exist, create them in HDFS. The Hive post install script doesn't create these directories because HDFS is not up and running during the deb file installation because JAVA_HOME is buried in hadoop-env.sh and HDFS can't start to allow these directories to be created.hadoop fs -mkdir /tmp hadoop fs -mkdir /user/hive/warehouse hadoop -chmod g+x /tmp hadoop -chmod g+x /user/hive/warehouse
- If the post install scripts didn't create directories /var/run/hive and /var/lock/subsys, create directory /var/run/hive and create directory /var/lock/subsys
sudo mkdir /var/run/hive
sudo mkdir /var/lock/subsys
- start the Hive Server
sudo /etc/init.d/hive-server start
- create a table in Hive and verify it is there
ubuntu@ip-10-101-53-136:~$ hive
WARNING: org.apache.hadoop.metrics.jvm.EventCounter is deprecated. Please use org.apache.hadoop.log.metrics.EventCounter in all the log4j.properties files.
Hive history file=/tmp/ubuntu/hive_job_log_ubuntu_201203202331_281981807.txt
hive> create table doh(id int);
OK
Time taken: 12.458 seconds
hive> show tables;
OK
doh
Time taken: 0.283 seconds
hive>
Running Mahout
- Set bash environment variables HADOOP_HOME=/usr/lib/hadoop, HADOOP_CONF_DIR=$HADOOP_HOME/conf
- Install Mahout, sudo apt-get install mahout
- Go to /usr/share/doc/mahout/examples/bin and unzip cluster-reuters.sh.gz
export HADOOP_HOME=/usr/lib/hadoop
export HADOOP_CONF_DIR=$HADOOP_HOME/conf
- modify the contents of cluster-reuters.sh, replace MAHOUT="../../bin/mahout" with MAHOUT="/usr/lib/mahout/bin/mahout"
- make sure the Hadoop file system is running and you have "curl" command on your system
- ./cluster-reuters.sh will display a menu selection
ubuntu@ip-10-224-109-199:/usr/share/doc/mahout/examples/bin$ ./cluster-reuters.sh
Please select a number to choose the corresponding clustering algorithm
1. kmeans clustering
2. fuzzykmeans clustering
3. lda clustering
4. dirichlet clustering
5. minhash clustering
Enter your choice : 1
ok. You chose 1 and we'll use kmeans Clustering
creating work directory at /tmp/mahout-work-ubuntu
Downloading Reuters-21578
% Total % Received % Xferd Average Speed Time Time Time Current
Dload Upload Total Spent Left Speed
100 7959k 100 7959k 0 0 346k 0 0:00:22 0:00:22 -::- 356k
Extracting...
AFTER WAITING 1/2 HR...
Inter-Cluster Density: 0.8080922658756075
Intra-Cluster Density: 0.6978329770855537
CDbw Inter-Cluster Density: 0.0
CDbw Intra-Cluster Density: 89.38857003754612
CDbw Separation: 303.4892272989769
12/03/29 03:42:56 INFO clustering.ClusterDumper: Wrote 19 clusters
12/03/29 03:42:56 INFO driver.MahoutDriver: Program took 261107 ms (Minutes: 4.351783333333334) - run classify-20newsgroups.sh, first modify the ../bin/mahout to /usr/lib/mahout/bin/mahout. Do a find and replace using your favorite editor. There are several instances of ../bin/mahout which need to be replaced by /usr/lib/mahout/bin/mahout
- run the rest of the examples under this directory except the netflix data set which is no longer officially available
Running Whirr
- Set AWS_ACCESS_KEY_ID and AWS_SECRET_ACCESS_KEY in .bashrc according to the values under your AWS account. Verify using echo $AWS_ACCESS_KEY_ID this is valid before proceeding.
- run the zookeeper recipe as below.
~/whirr-0.7.1:bin/whirr launch-cluster --config recipes/hadoop-ec2.properties
- if you get an error message like:
apply Whirr patch 459: https://issues.apache.org/jira/browse/WHIRR-459
Unable to start the cluster. Terminating all nodes.
org.apache.whirr.net.DnsException: java.net.ConnectException: Connection refused
at org.apache.whirr.net.FastDnsResolver.apply(FastDnsResolver.java:83)
at org.apache.whirr.net.FastDnsResolver.apply(FastDnsResolver.java:40)
at org.apache.whirr.Cluster$Instance.getPublicHostName(Cluster.java:112)
at org.apache.whirr.Cluster$Instance.getPublicAddress(Cluster.java:94)
at org.apache.whirr.service.hadoop.HadoopNameNodeClusterActionHandler.doBeforeConfigure(HadoopNameNodeClusterActionHandler.java:58)
at org.apache.whirr.service.hadoop.HadoopClusterActionHandler.beforeConfigure(HadoopClusterActionHandler.java:87)
at org.apache.whirr.service.ClusterActionHandlerSupport.beforeAction(ClusterActionHandlerSupport.java:53)
at org.apache.whirr.actions.ScriptBasedClusterAction.execute(ScriptBasedClusterAction.java:100)
at org.apache.whirr.ClusterController.launchCluster(ClusterController.java:109)
at org.apache.whirr.cli.command.LaunchClusterCommand.run(LaunchClusterCommand.java:63)
at org.apache.whirr.cli.Main.run(Main.java:64)
at org.apache.whirr.cli.Main.main(Main.java:97) - When whirr is finished launching the cluster, you will see an entry under ~/.whirr to verify the cluster is running
- cat out the hadoop-proxy.sh command to find the EC2 instance address or you can cat out the instance file. Both will give you the Hadoop namenode address even though you started the mahout service using whirr.
- ssh into the instance to verify you can login. Note: this login is different than a normal EC2 instance login. The ssh key is id_rsa and there is no user name for the instance IP address ~/.whirr/mahout:ssh -i ~/.ssh/id_rsa ec2-50-16-85-59.compute-1.amazonaws.com
#verify you can access the HDFS file system from the instancedc@ip-10-70-18-203:~$ hadoop fs -ls / Found 3 items drwxr-xr-x - hadoop supergroup 0 2012-03-30 23:44 /hadoop drwxrwxrwx - hadoop supergroup 0 2012-03-30 23:44 /tmp drwxrwxrwx - hadoop supergroup 0 2012-03-30 23:44 /user
Running Oozie
- Stop the Oozie daemons using ps -ef | grep oozie to find them then sudo kill -i pid ( the pid from the ps -ef command)
- Stopping the Oozie daemons may not remove the oozie.pid file which tells the system an oozie process is running. You may have to manually remove the pid file using sudo rm -rf /var/run/oozie/oozie.pid
- cd into /usr/lib/oozie and setup the oozie environment variables using bin/oozie-env.sh
- Download ext-2.2.js from http://incubator.apache.org/oozie/QuickStart.html
- Install ext-2.2.js using
bin/oozie-setup.sh -hadoop 1.0.1 ${HADOOP_HOME} -extjs ext-2.2.zip - You will get an error message change the above to the highest Hadoop version available,
sudo bin/oozie-setup.sh -hadoop 0.20.200 ${HADOOP_HOME} -extjs ext-2.2.zip - start oozie, sudo bin/oozie-start.sh
- run oozie, sudo bin/oozie-run.sh you will get a lot of error messages, this is ok.
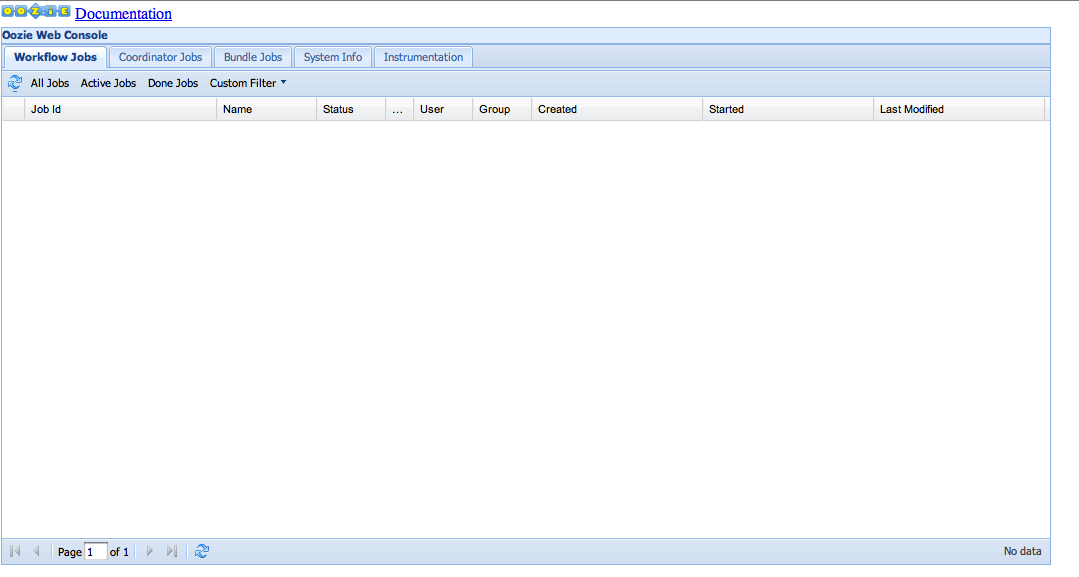
- go to the public DNS EC2 address/oozie/11000, my address looked like: http://ec2-67-202-18-159.compute-1.amazonaws.com:11000/oozie/
- go to the Oozie apache page and run the oozie examples
Running Zookeeper
Zookeeper is installed as part of HBase. Add the zookeeper echo example
Running Sqoop
Install SQOOP using: [redhat@ip-10-28-189-235 ~]$ sudo yum install sqoop
*
You should see:
Loaded plugins: amazon-id, rhui-lb, security
Setting up Install Process
Resolving Dependencies
--> Running transaction check
---> Package sqoop.noarch 0:1.4.1-1.fc16 will be installed
---> Package sqoop-metastore.noarch 0:1.4.1-1.fc16 will be installed
--> Finished Dependency Resolution
Dependencies Resolved
==============================================================================================
Package Arch Version Repository Size
==============================================================================================
Installing:
sqoop noarch 1.4.1-1.fc16 bigtop-0.3.0-incubating 3.4 M
sqoop-metastore noarch 1.4.1-1.fc16 bigtop-0.3.0-incubating 4.9 k
Transaction Summary
==============================================================================================
Install 2 Package(s)
Total download size: 3.4 M
Installed size: 4.9 M
Is this ok [y/N]: y
Downloading Packages:
(1/2): sqoop-1.4.1-1.fc16.noarch.rpm | 3.4 MB 00:01
(2/2): sqoop-metastore-1.4.1-1.fc16.noarch.rpm | 4.9 kB 00:00
----------------------------------------------------------------------------------------------
Total 2.0 MB/s | 3.4 MB 00:01
Running rpm_check_debug
Running Transaction Test
Transaction Test Succeeded
Running Transaction
Installing : sqoop-1.4.1-1.fc16.noarch 1/2
Installing : sqoop-metastore-1.4.1-1.fc16.noarch 2/2
Installed:
sqoop.noarch 0:1.4.1-1.fc16 sqoop-metastore.noarch 0:1.4.1-1.fc16
Complete!
To test SQOOP is running run the CLI: