DUE TO SPAM, SIGN-UP IS DISABLED. Goto Selfserve wiki signup and request an account.
| Wiki Markup |
|---|
{scrollbar} |
The first step is to ask Maven to generate the Eclipse control files (.classpath and .project) for us:
| No Format |
|---|
$ mvn eclipse:eclipse -DdownloadSources=true
[INFO] Scanning for projects...
[INFO] Searching repository for plugin with prefix: 'eclipse'.
[INFO] org.apache.maven.plugins: checking for updates from apache-snapshots
[INFO] org.codehaus.mojo: checking for updates from apache-snapshots
[INFO] artifact org.apache.maven.plugins:maven-eclipse-plugin: checking for updates from apache-snapshots
[INFO] snapshot org.apache.maven.plugins:maven-eclipse-plugin:2.9-SNAPSHOT: checking for updates from apache-snapshots
Downloading: http://repository.apache.org/snapshots//org/apache/maven/plugins/maven-eclipse-plugin/2.9-SNAPSHOT/maven-eclipse-plugin-2.9-20101117.070458-148.pom
11K downloaded  (maven-eclipse-plugin-2.9-20101117.070458-148.pom)
Downloading: http://repository.apache.org/snapshots//org/apache/maven/plugins/maven-eclipse-plugin/2.9-SNAPSHOT/maven-eclipse-plugin-2.9-20101117.070458-148.jar
194K downloaded  (maven-eclipse-plugin-2.9-20101117.070458-148.jar)
[INFO] ------------------------------------------------------------------------
[INFO] Building tutorial1 Tapestry 5 Application
[INFO]    task-segment: [eclipse:eclipse]
[INFO] ------------------------------------------------------------------------
[INFO] Preparing eclipse:eclipse
[INFO] No goals needed for project - skipping
[INFO] [eclipse:eclipse {execution: default-cli}]
[INFO] Using Eclipse Workspace: /Users/Howard/Documents/workspace
[INFO] Adding default classpath container: org.eclipse.jdt.launching.JRE_CONTAINER
[INFO] Wrote settings to /Users/Howard/Documents/workspace/tutorial1/.settings/org.eclipse.jdt.core.prefs
[INFO] Wrote Eclipse project for "tutorial1" to /Users/Howard/Documents/workspace/tutorial1.
[INFO]
[INFO] ------------------------------------------------------------------------
[INFO] BUILD SUCCESSFUL
[INFO] ------------------------------------------------------------------------
[INFO] Total time: 5 seconds
[INFO] Finished at: Wed Nov 17 17:13:11 PST 2010
[INFO] Final Memory: 21M/81M
[INFO] ------------------------------------------------------------------------
~/Documents/workspace/tutorial1
$
|
At this point, Maven has created the Eclipse .project and .classpath files, and we can import the project. In addition, since we specified -DdownloadSources=true, Maven has also downloaded the sources of each library and linked to the source JAR; that means we can see the sources for any Tapestry classes right inside Eclipse, which is very useful when debugging or exploring.
At this point, we are ready to import the project created by Maven into Eclipse so we can start working with it. Launch Eclipse and switch over to the Java Perspective.
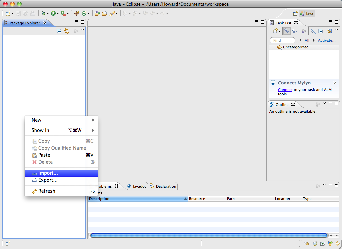
Right click inside the Package Explorer view and select Import ...
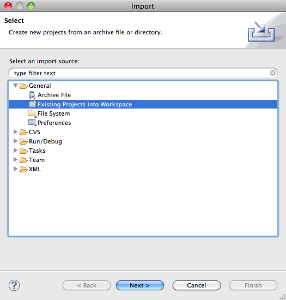
Choose the "existing projects" option:
Now select the folder created by Maven:
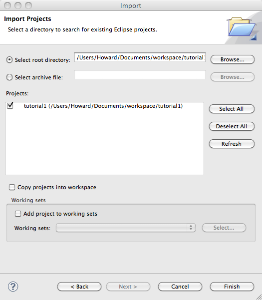
When you click the Finish button, the project will be imported into the Eclipse workspace.
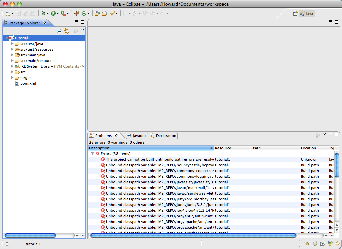
However; there are many errors. Maven expects that you will configure a classpath variable, M2_REPO, that points at your local repository; a directory in your home directory that stores all those downloaded JARs and other files. Open Eclipse's preferences panel and navigate to Java > Build Path > Classpath Variables:
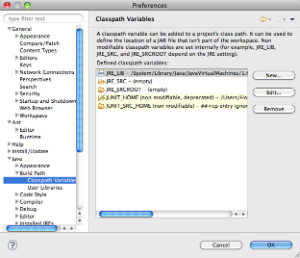
Click the New button, and enter the new variable (you'll have to adjust this for your operating system and local paths):
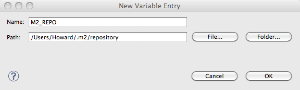
Eclipse will ask to perform a clean build, and the errors will be gone once it has done so.
Running the Application inside Eclipse
The task is to set up Jetty to run our application directly out of our Eclipse workspace. This is a great way to develop web applications, since we don't want to have to use Maven to compile and run the application ... or worse yet, use Maven to package and deploy the application. That's for later, when we want to put the application into production. For development, we want a fast, agile environment that can keep up with our changes, and that means we can't wait for redeploys and restarts.
Choose the Run ... item from the Eclipse Run menu to get the launch configuration dialog:
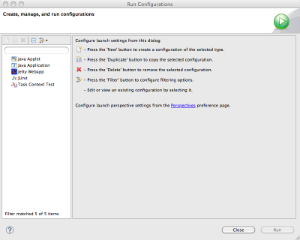
Select Jetty Webapp and click the New button, then fill in a few values:
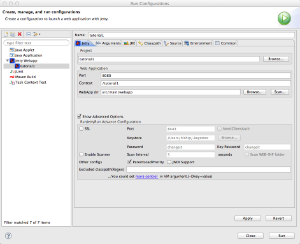
Make sure you clear the field labeled HTTPS.
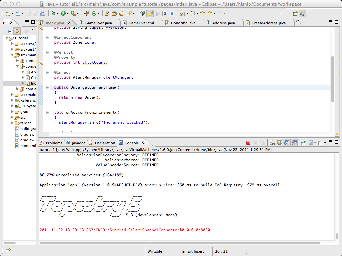
You can then click Run and Jetty will launch (it takes only a few seconds):
Once you click Run, Jetty will start up and launch (it should take about two seconds).
You may now start the application with the URL http://localhost:8080/tutorial1/
...
This page is no longer used. See Tapestry Tutorial